Introduction
I decided to enhance the look of my Tacoma by buying a skid plate. While I do want something that will work as a skid plate, I didn’t want a lump of grey metal. The TRD Pro skid looks good but I’m not a big fan of trying to make one trim look like another.
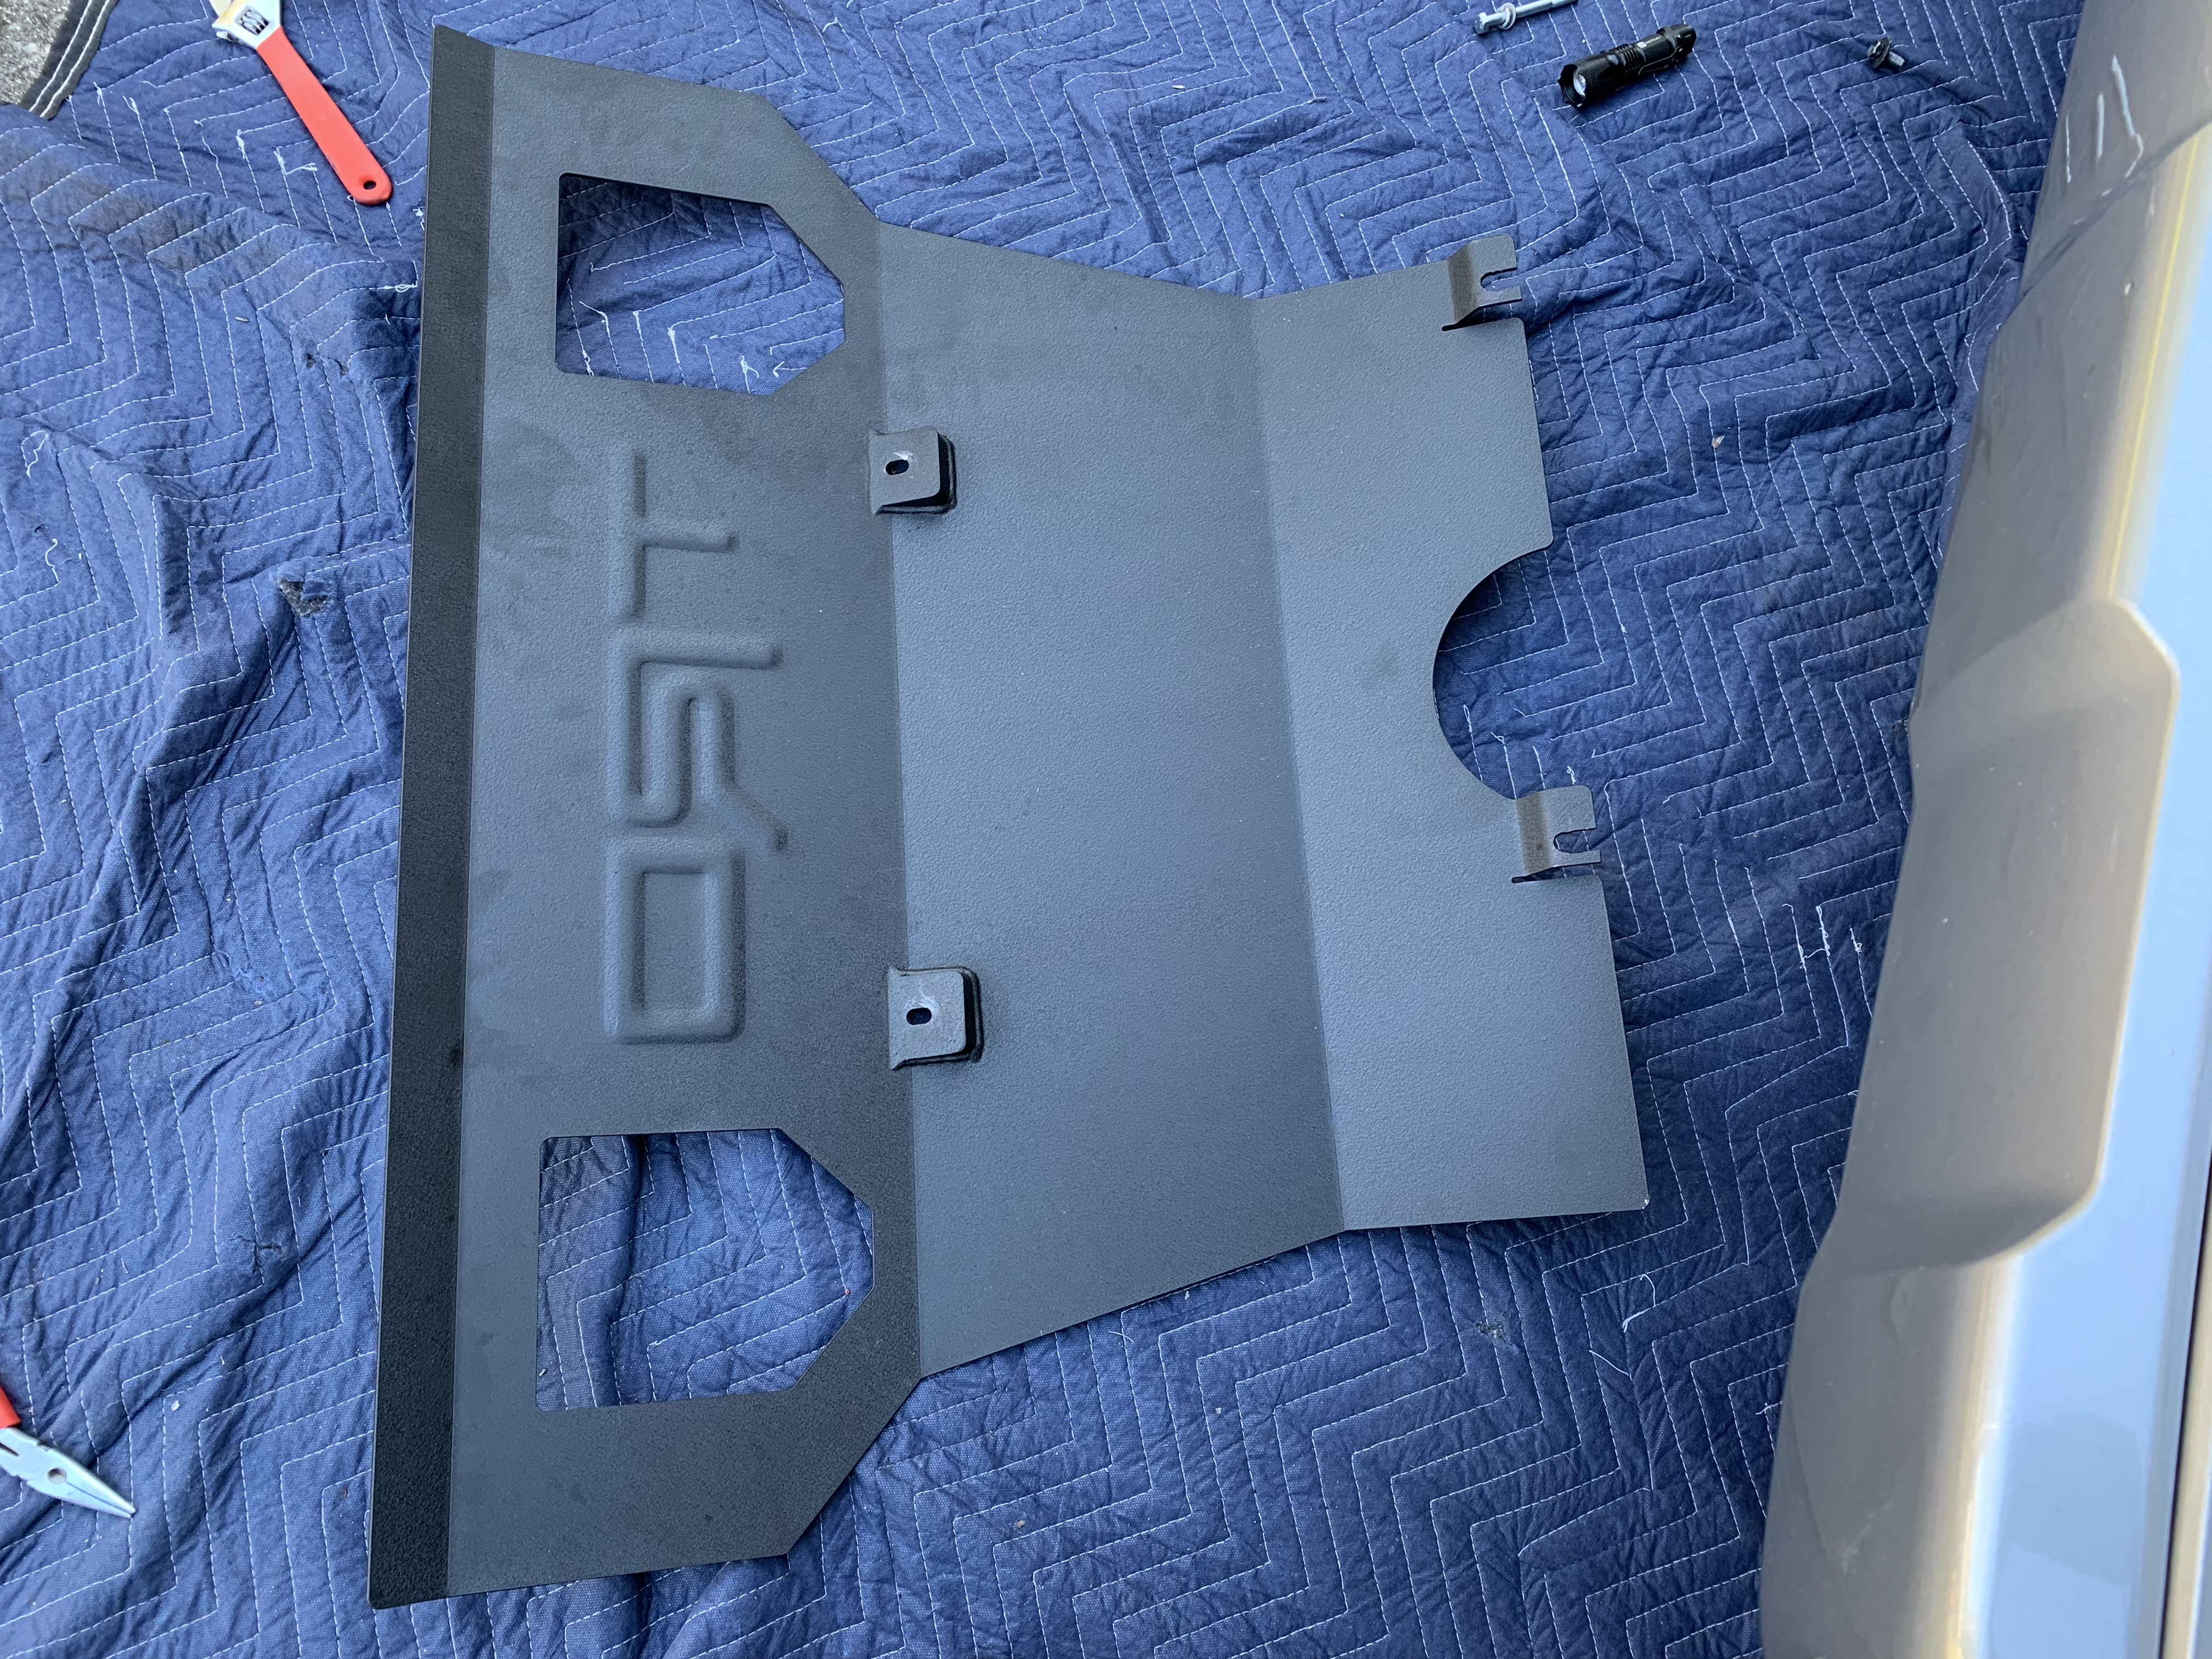
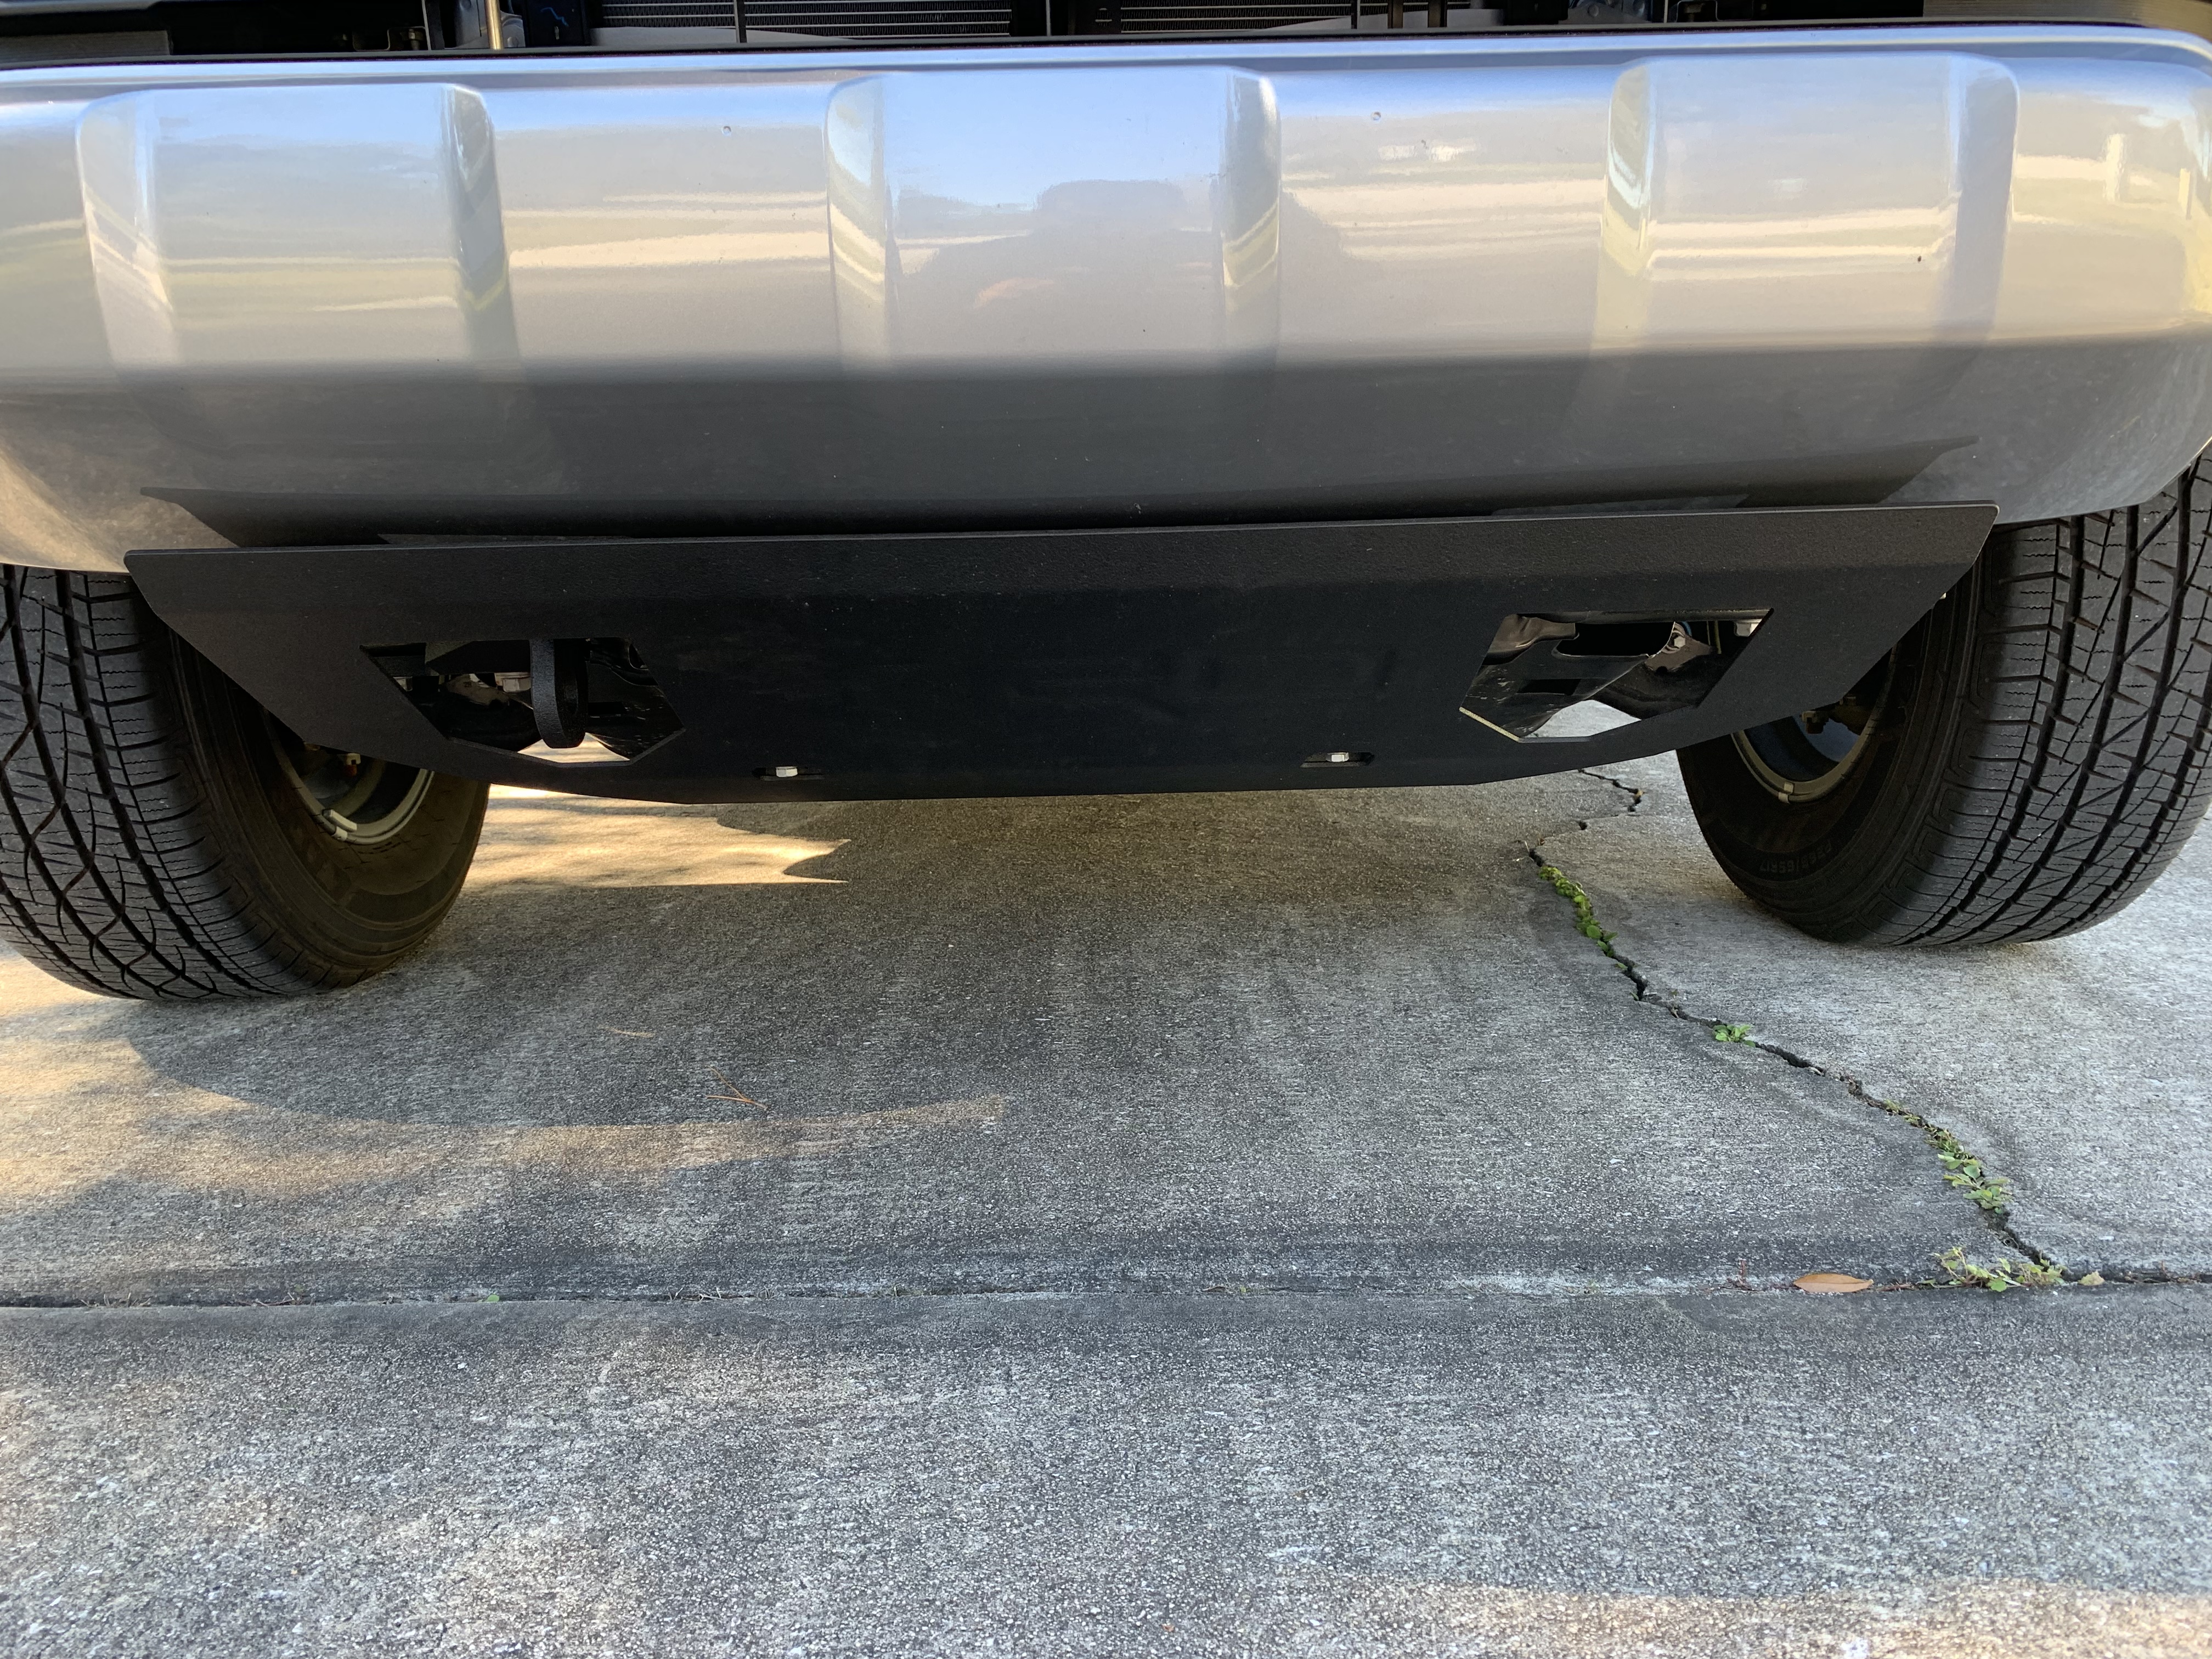
I decided to get Bullet Proof Fabricating’s (BPF) skid plate. It works as as skid and in my opinion is the best looking one you can get for the Tacoma. That said, it is a short skid and doesn’t cover the transfer case. I don’t do any type of off roading that would need a skid in the first place so this isn’t a problem for me. If it were, I could get a separate one just for the transfer case.
I also got their recovery tow hook. Again, not because I really need it but because it looked good. It might come in handy one day so why not.
Skid Plate Design
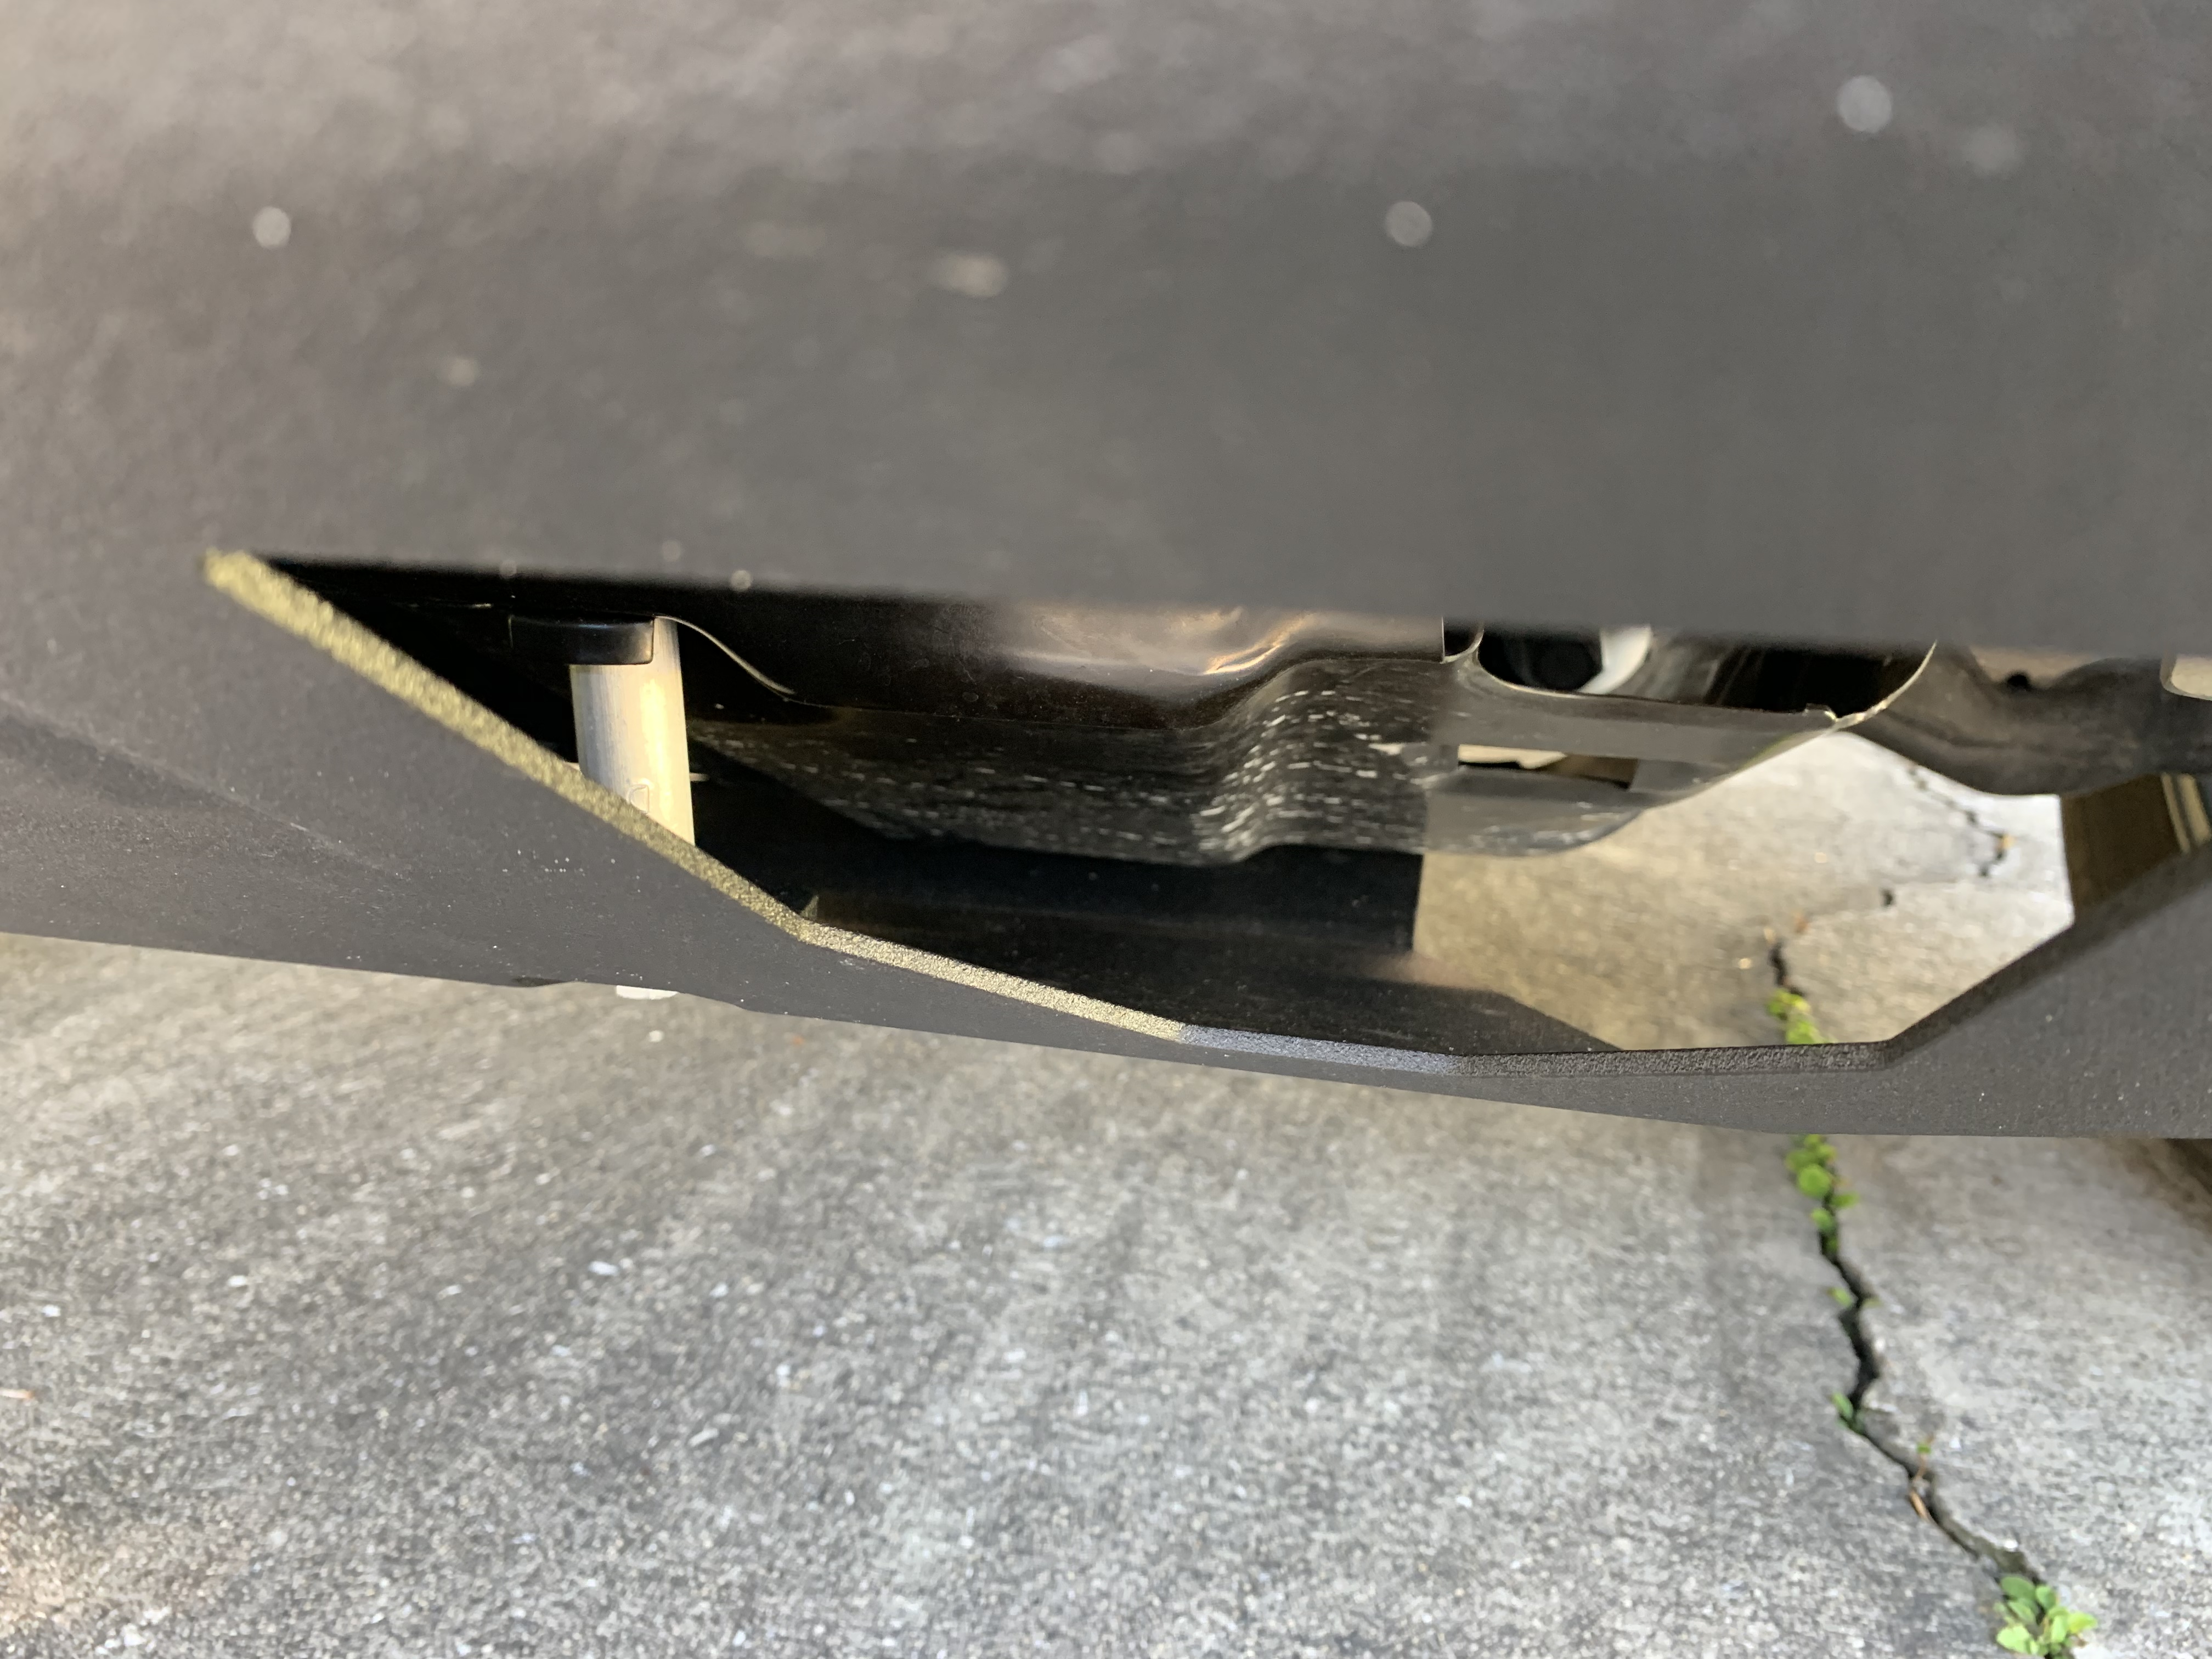
The design is very clever because it uses the factory splash guard. The skid has open holes on the front which allow for things like the recovery tow hook to poke out. Since there are opening and the underside of the truck still needs to be protected from debris, the splash guard stays.
The skid will still take an impact and doesn’t rely on the splash guard to do any more than it already does. The skid goes in front of the splash guard and leaves it less exposed than it would be without the skid. The open holes aren’t anything to worry about and are functional.
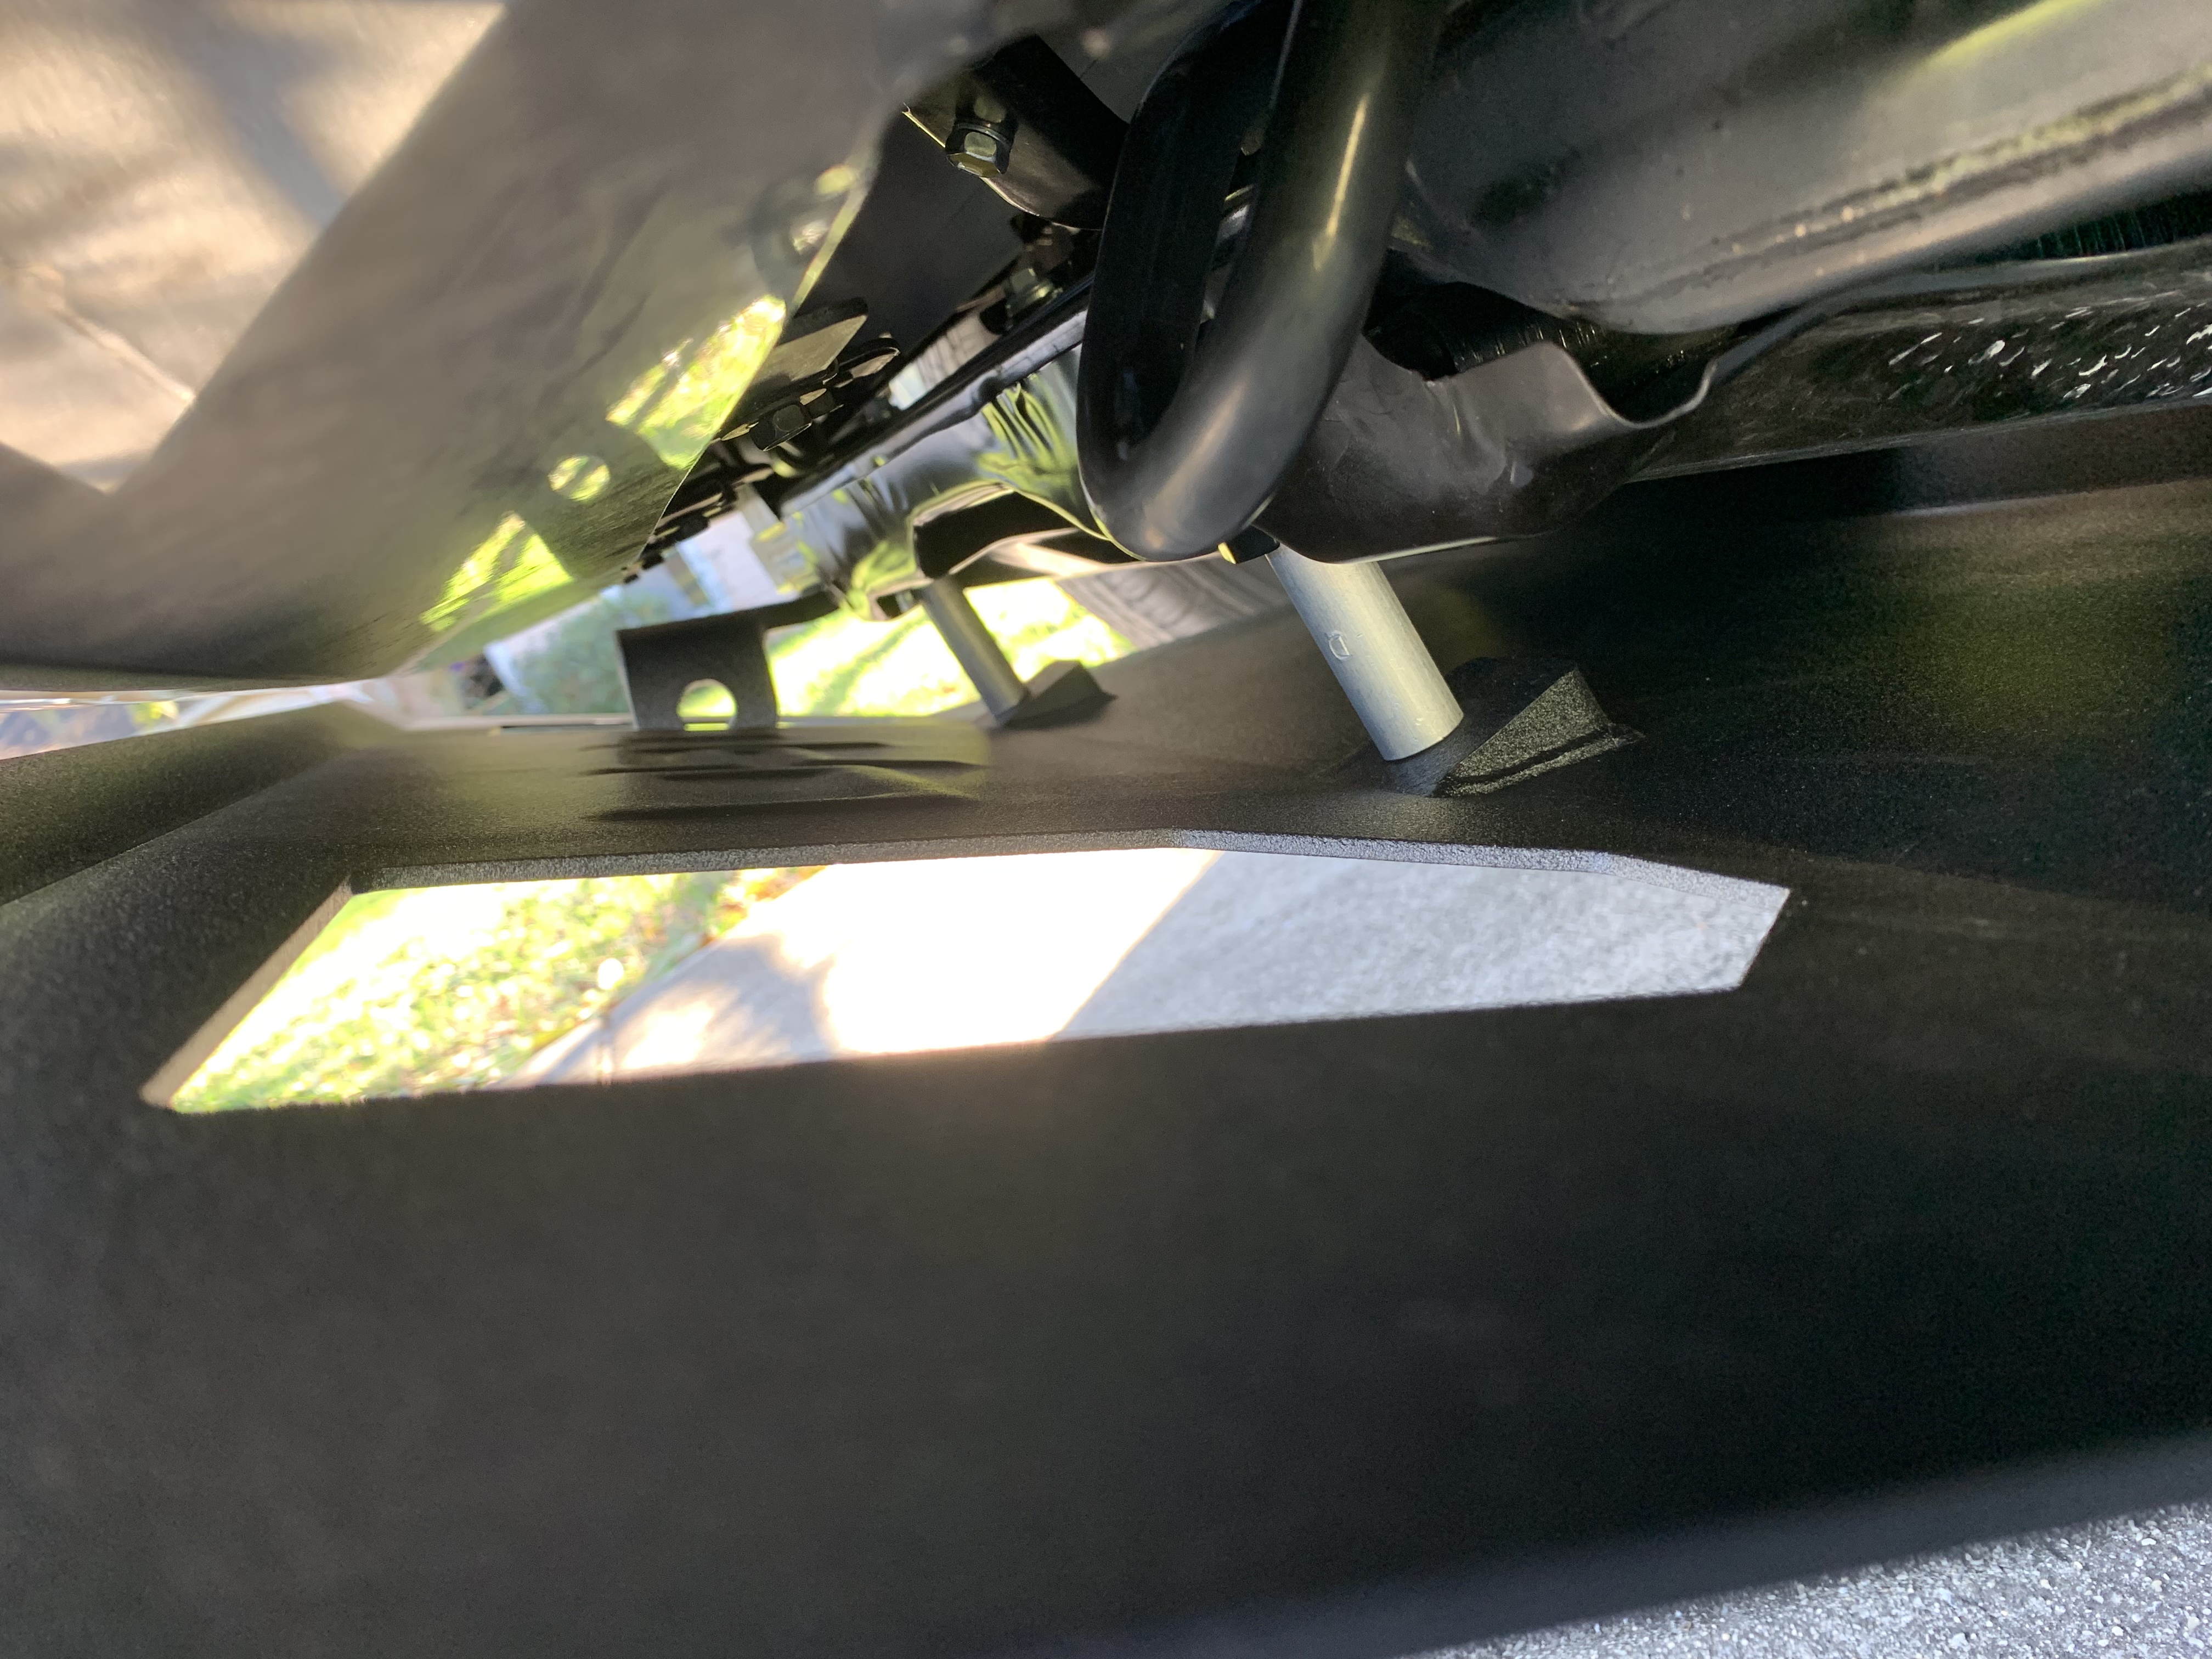
Left side front:
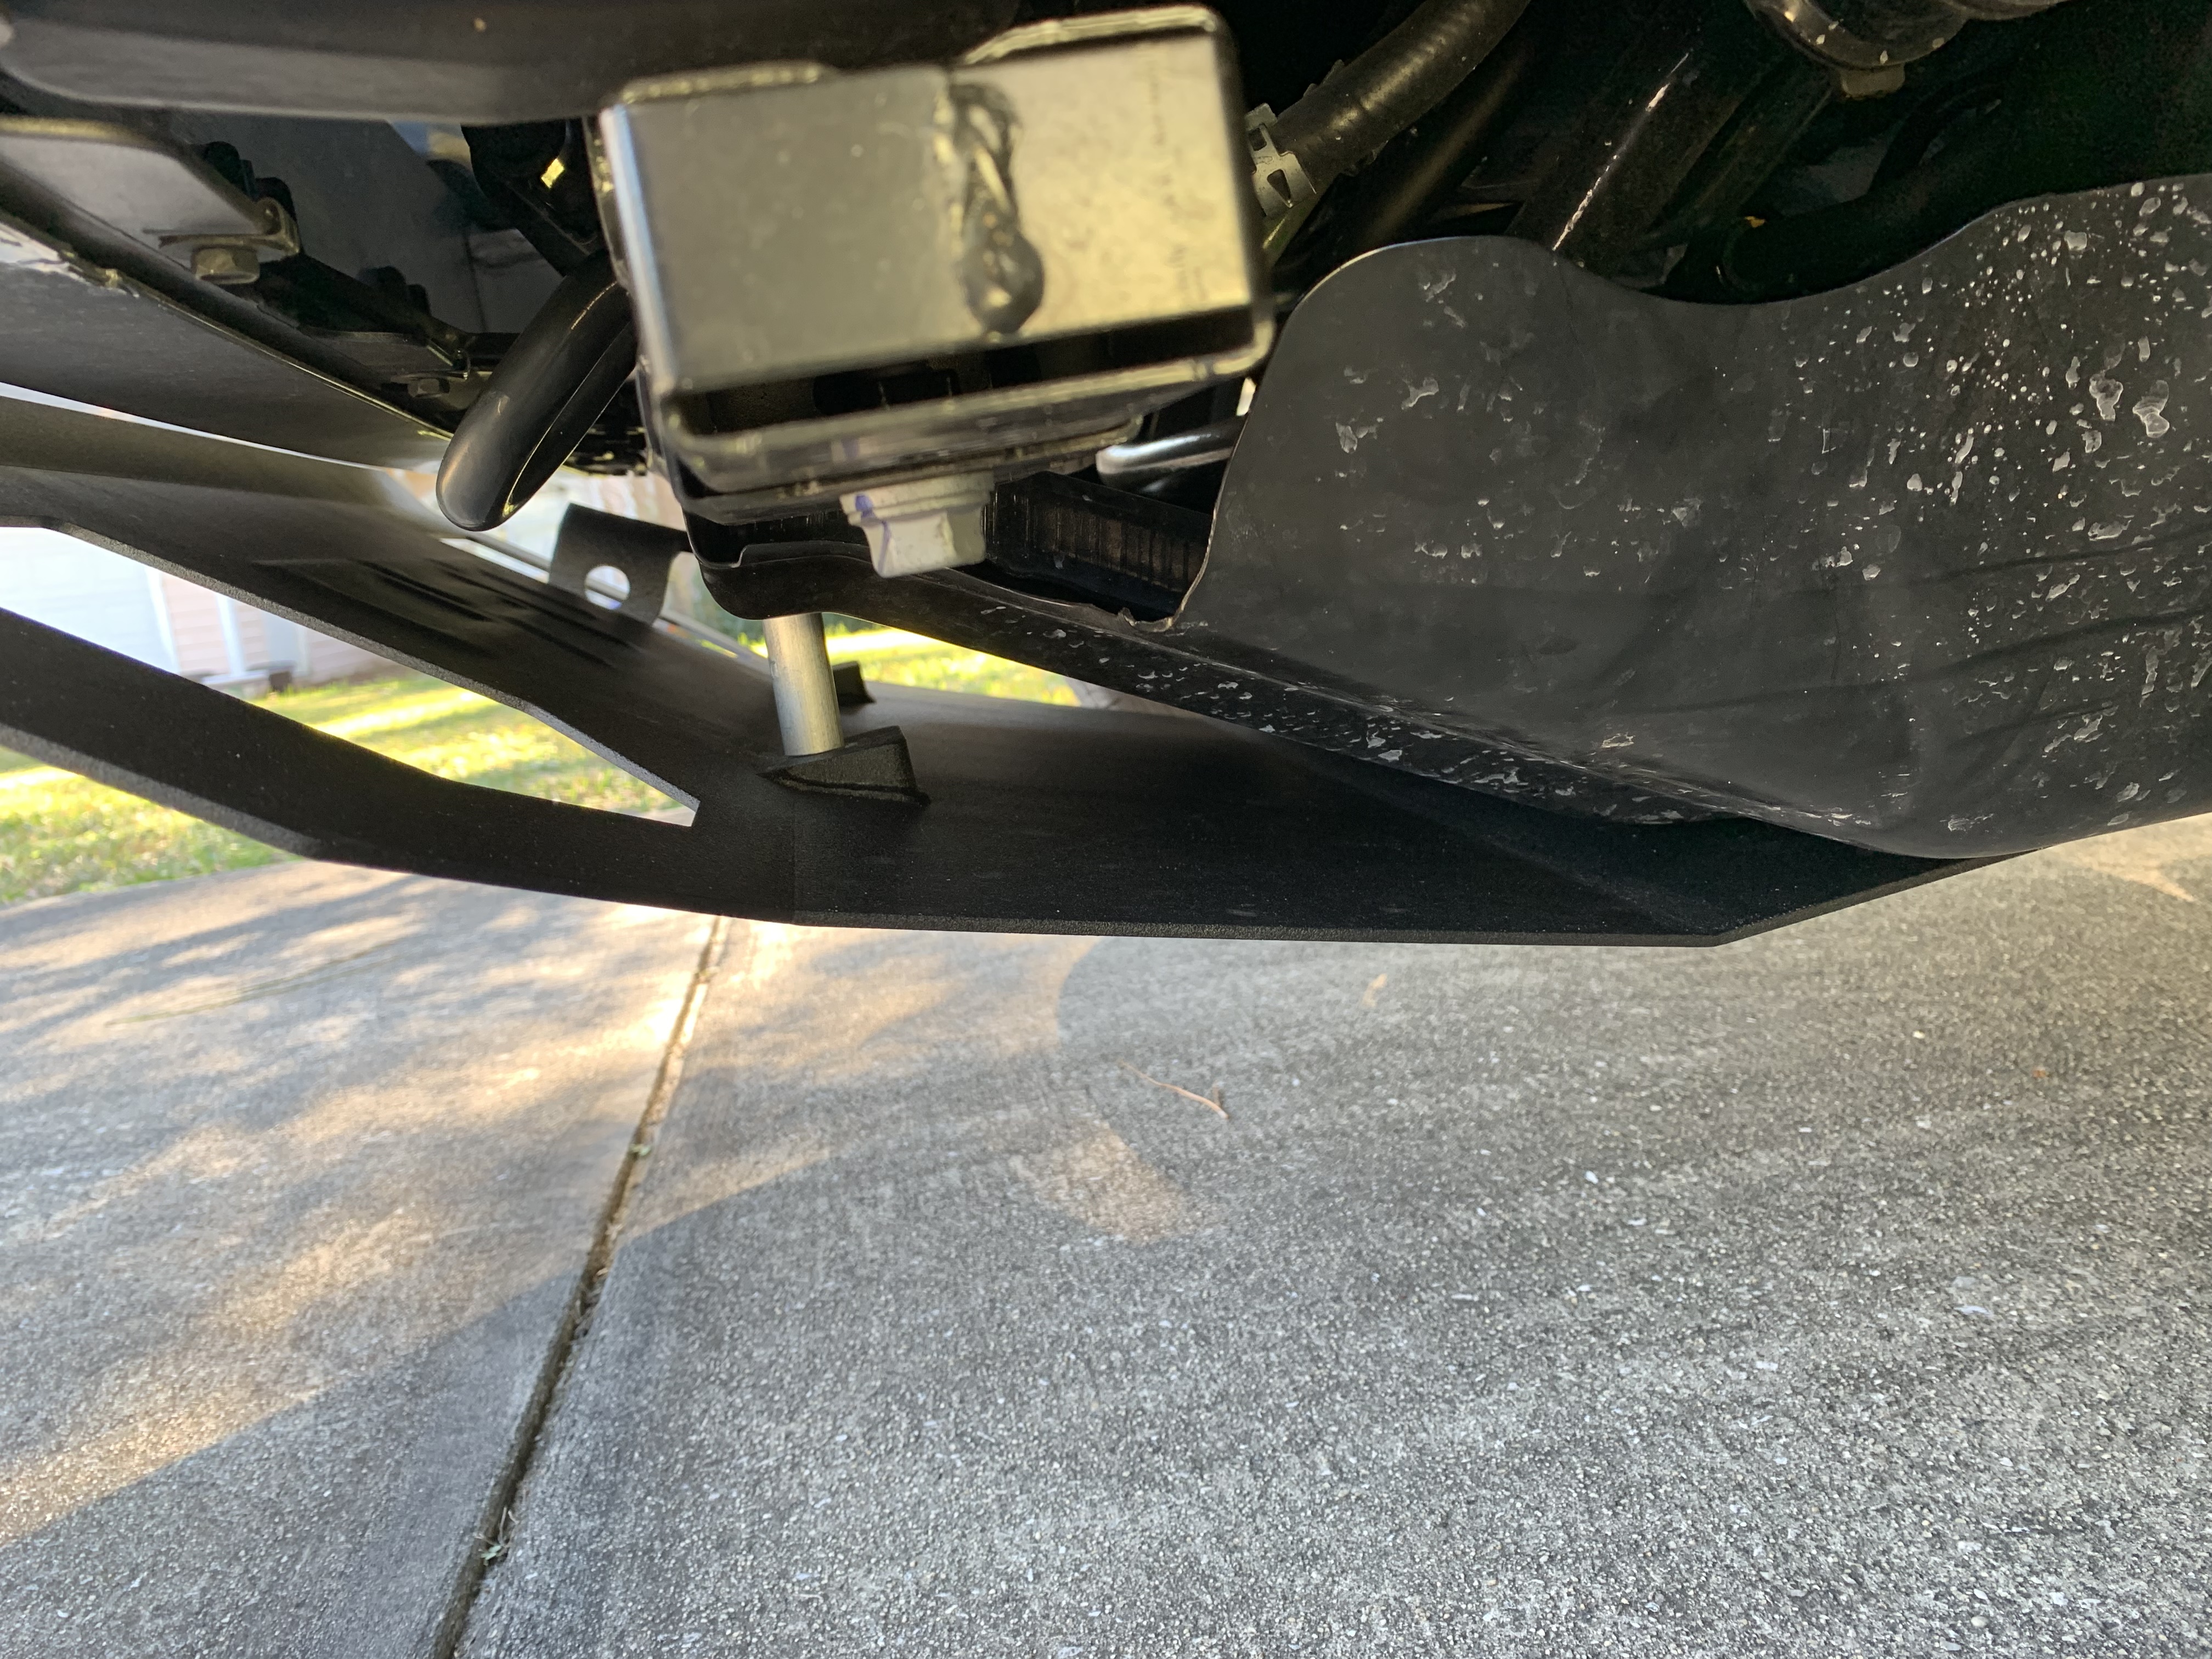
Left side side:
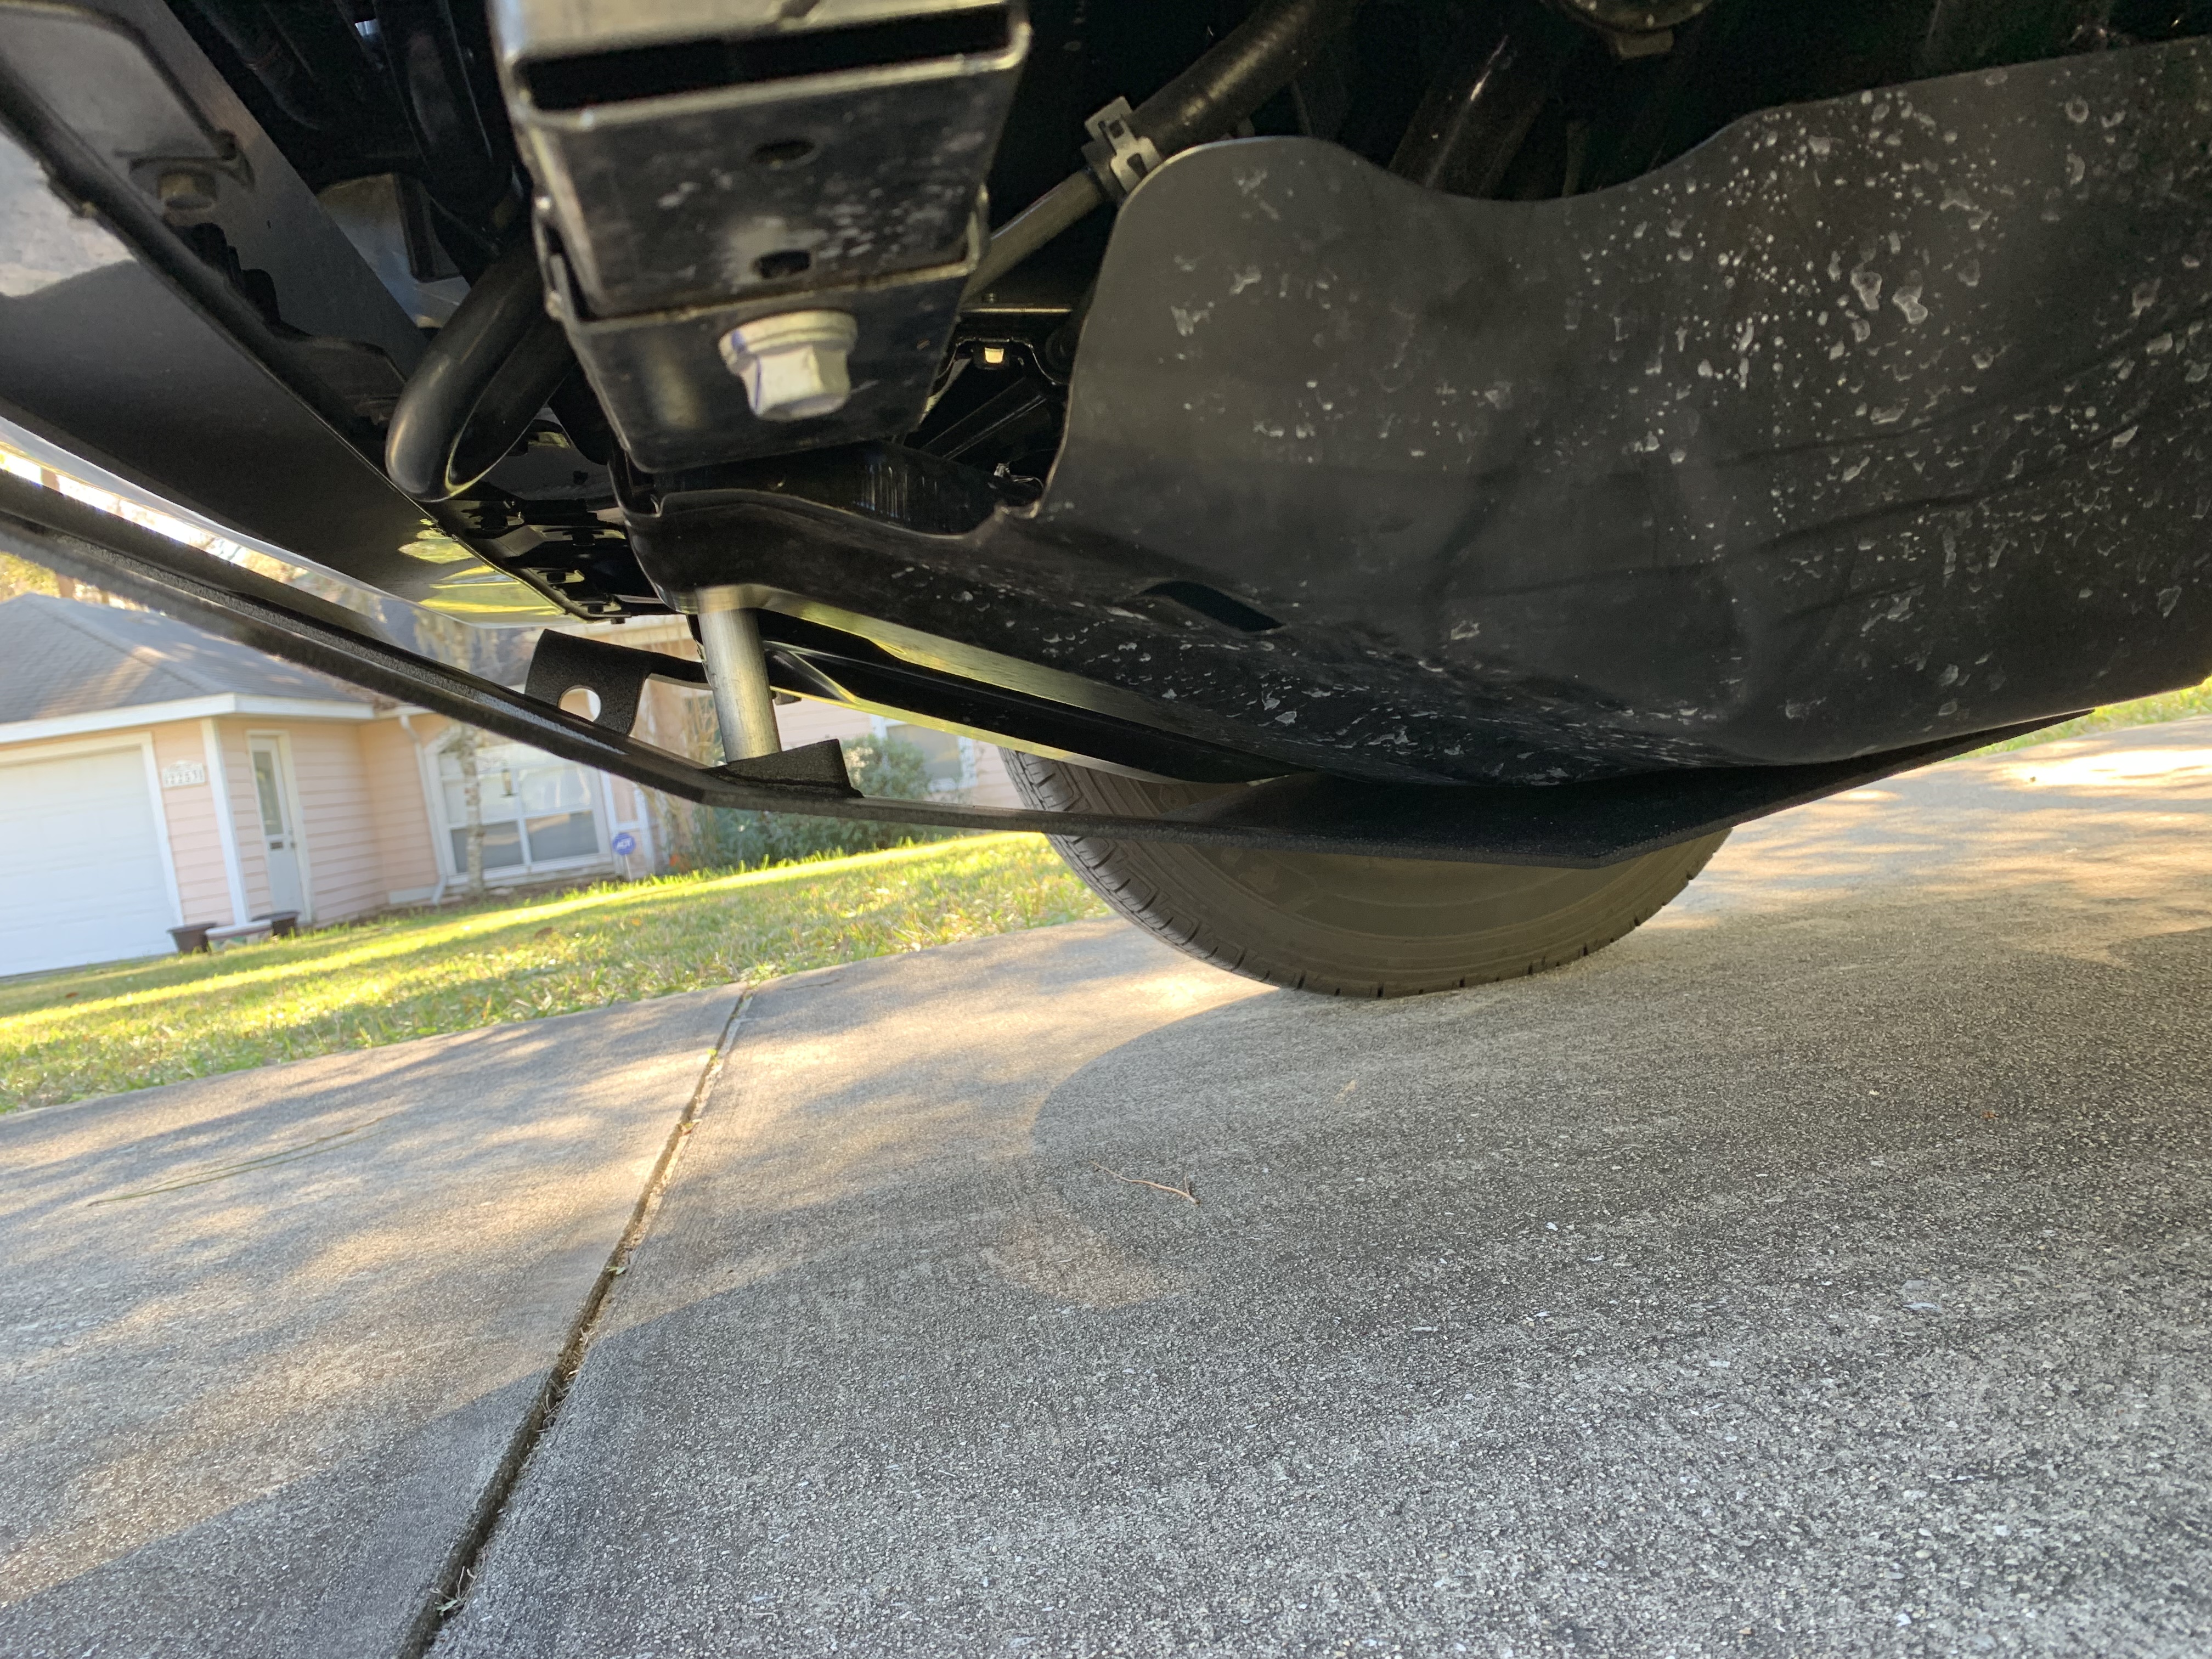
Another angle:
Oil Change
Since this goes over the factory splash guard it has the same issue when you need to do an oil change. You have to take the whole thing off.
Some skid plates (TRD Pro one) have a small cover you can remove for oil changes. Those replace the splash guard and since this one reuses the splash guard it isn’t possible to have that sort of design. I don’t see this as a problem because even if I didn’t have this skid, I’d have to take off the splash guard anyway. This is just something to be aware of with skids in general. Many need to be removed for an oil change.
Installation
Installation looked very simple and the instructions were only one page. Essentially,
- Remove the front air dam (the plastic valance). I have a Sport so I have one of these but not all trims do.
- Loosen the back two bolts (but don’t remove) holding the splash guard.
- Remove the front two bolts holding the splash guard and let the splash guard rest on the front hooks.
- Slide the skid plate onto the back bolts between the washer and splash guard.
- Use the new bolts and spacers to attach the skid plate on the front. From top to bottom have a sandwich of, truck, splash guard, spacer, skid plate, and the bolt going through all of them.
- Tighten everything all four bolts.
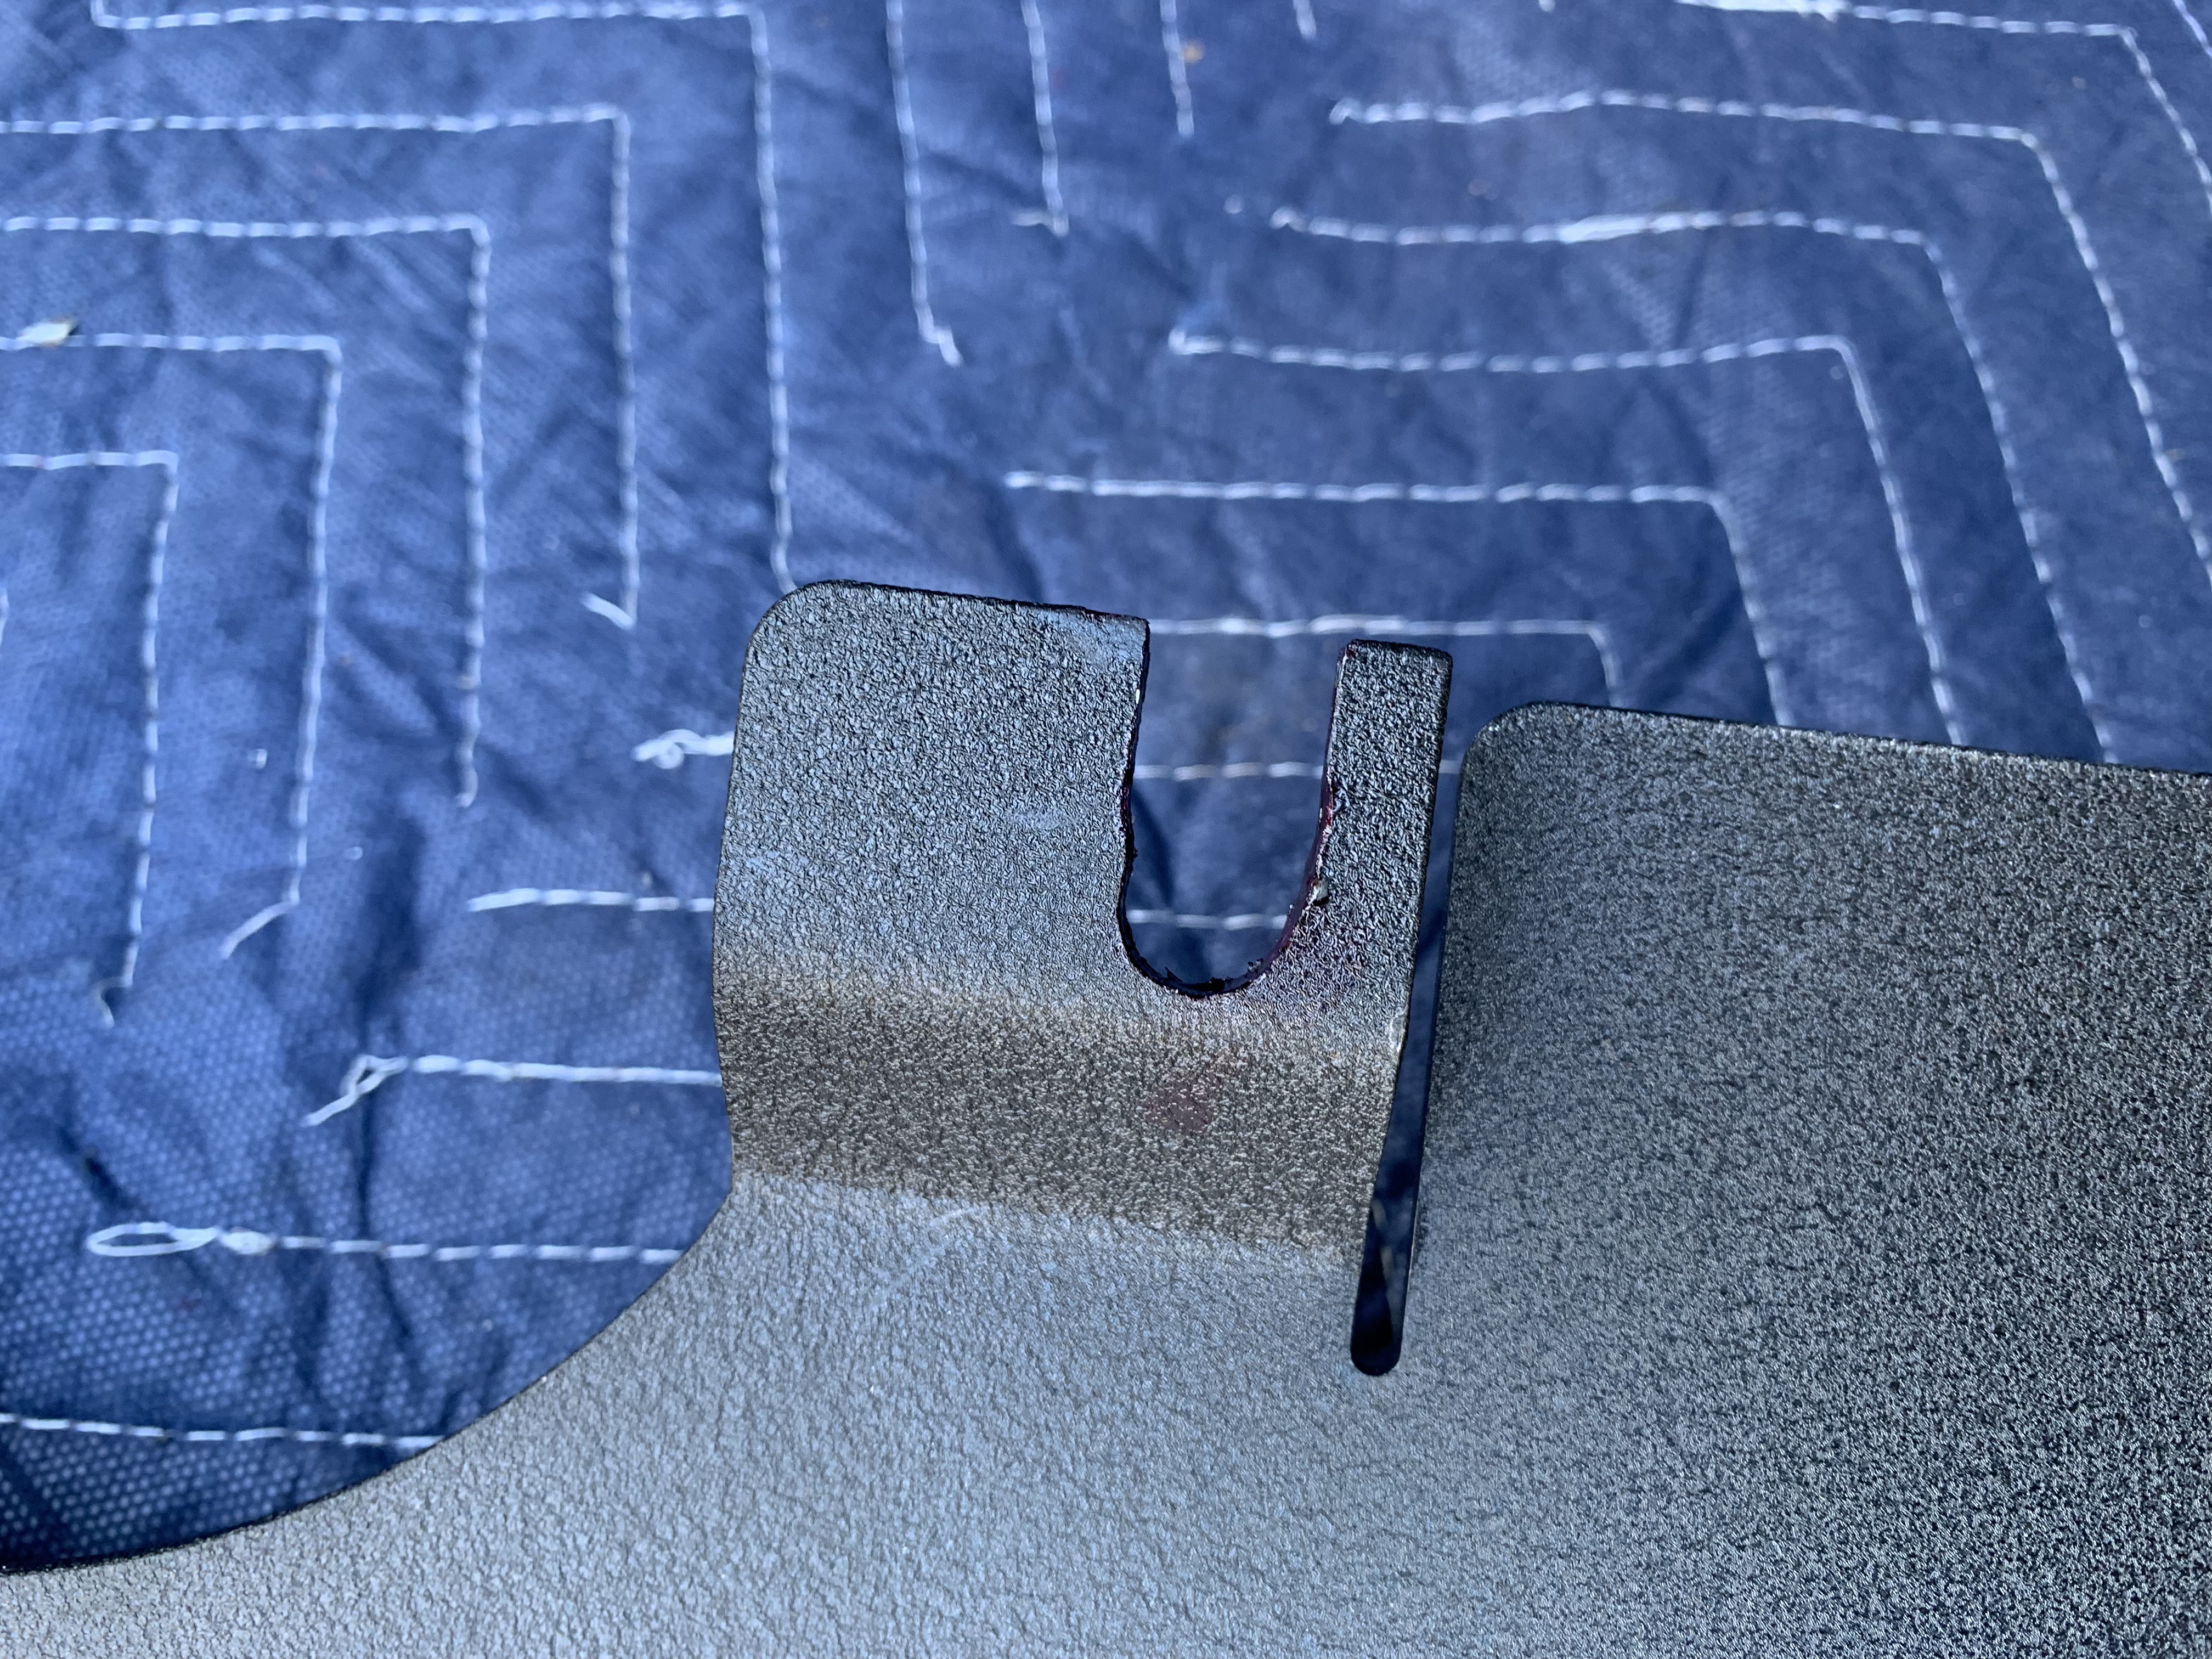
Here is a picture of the hooks the front of the splash guard will rest on.
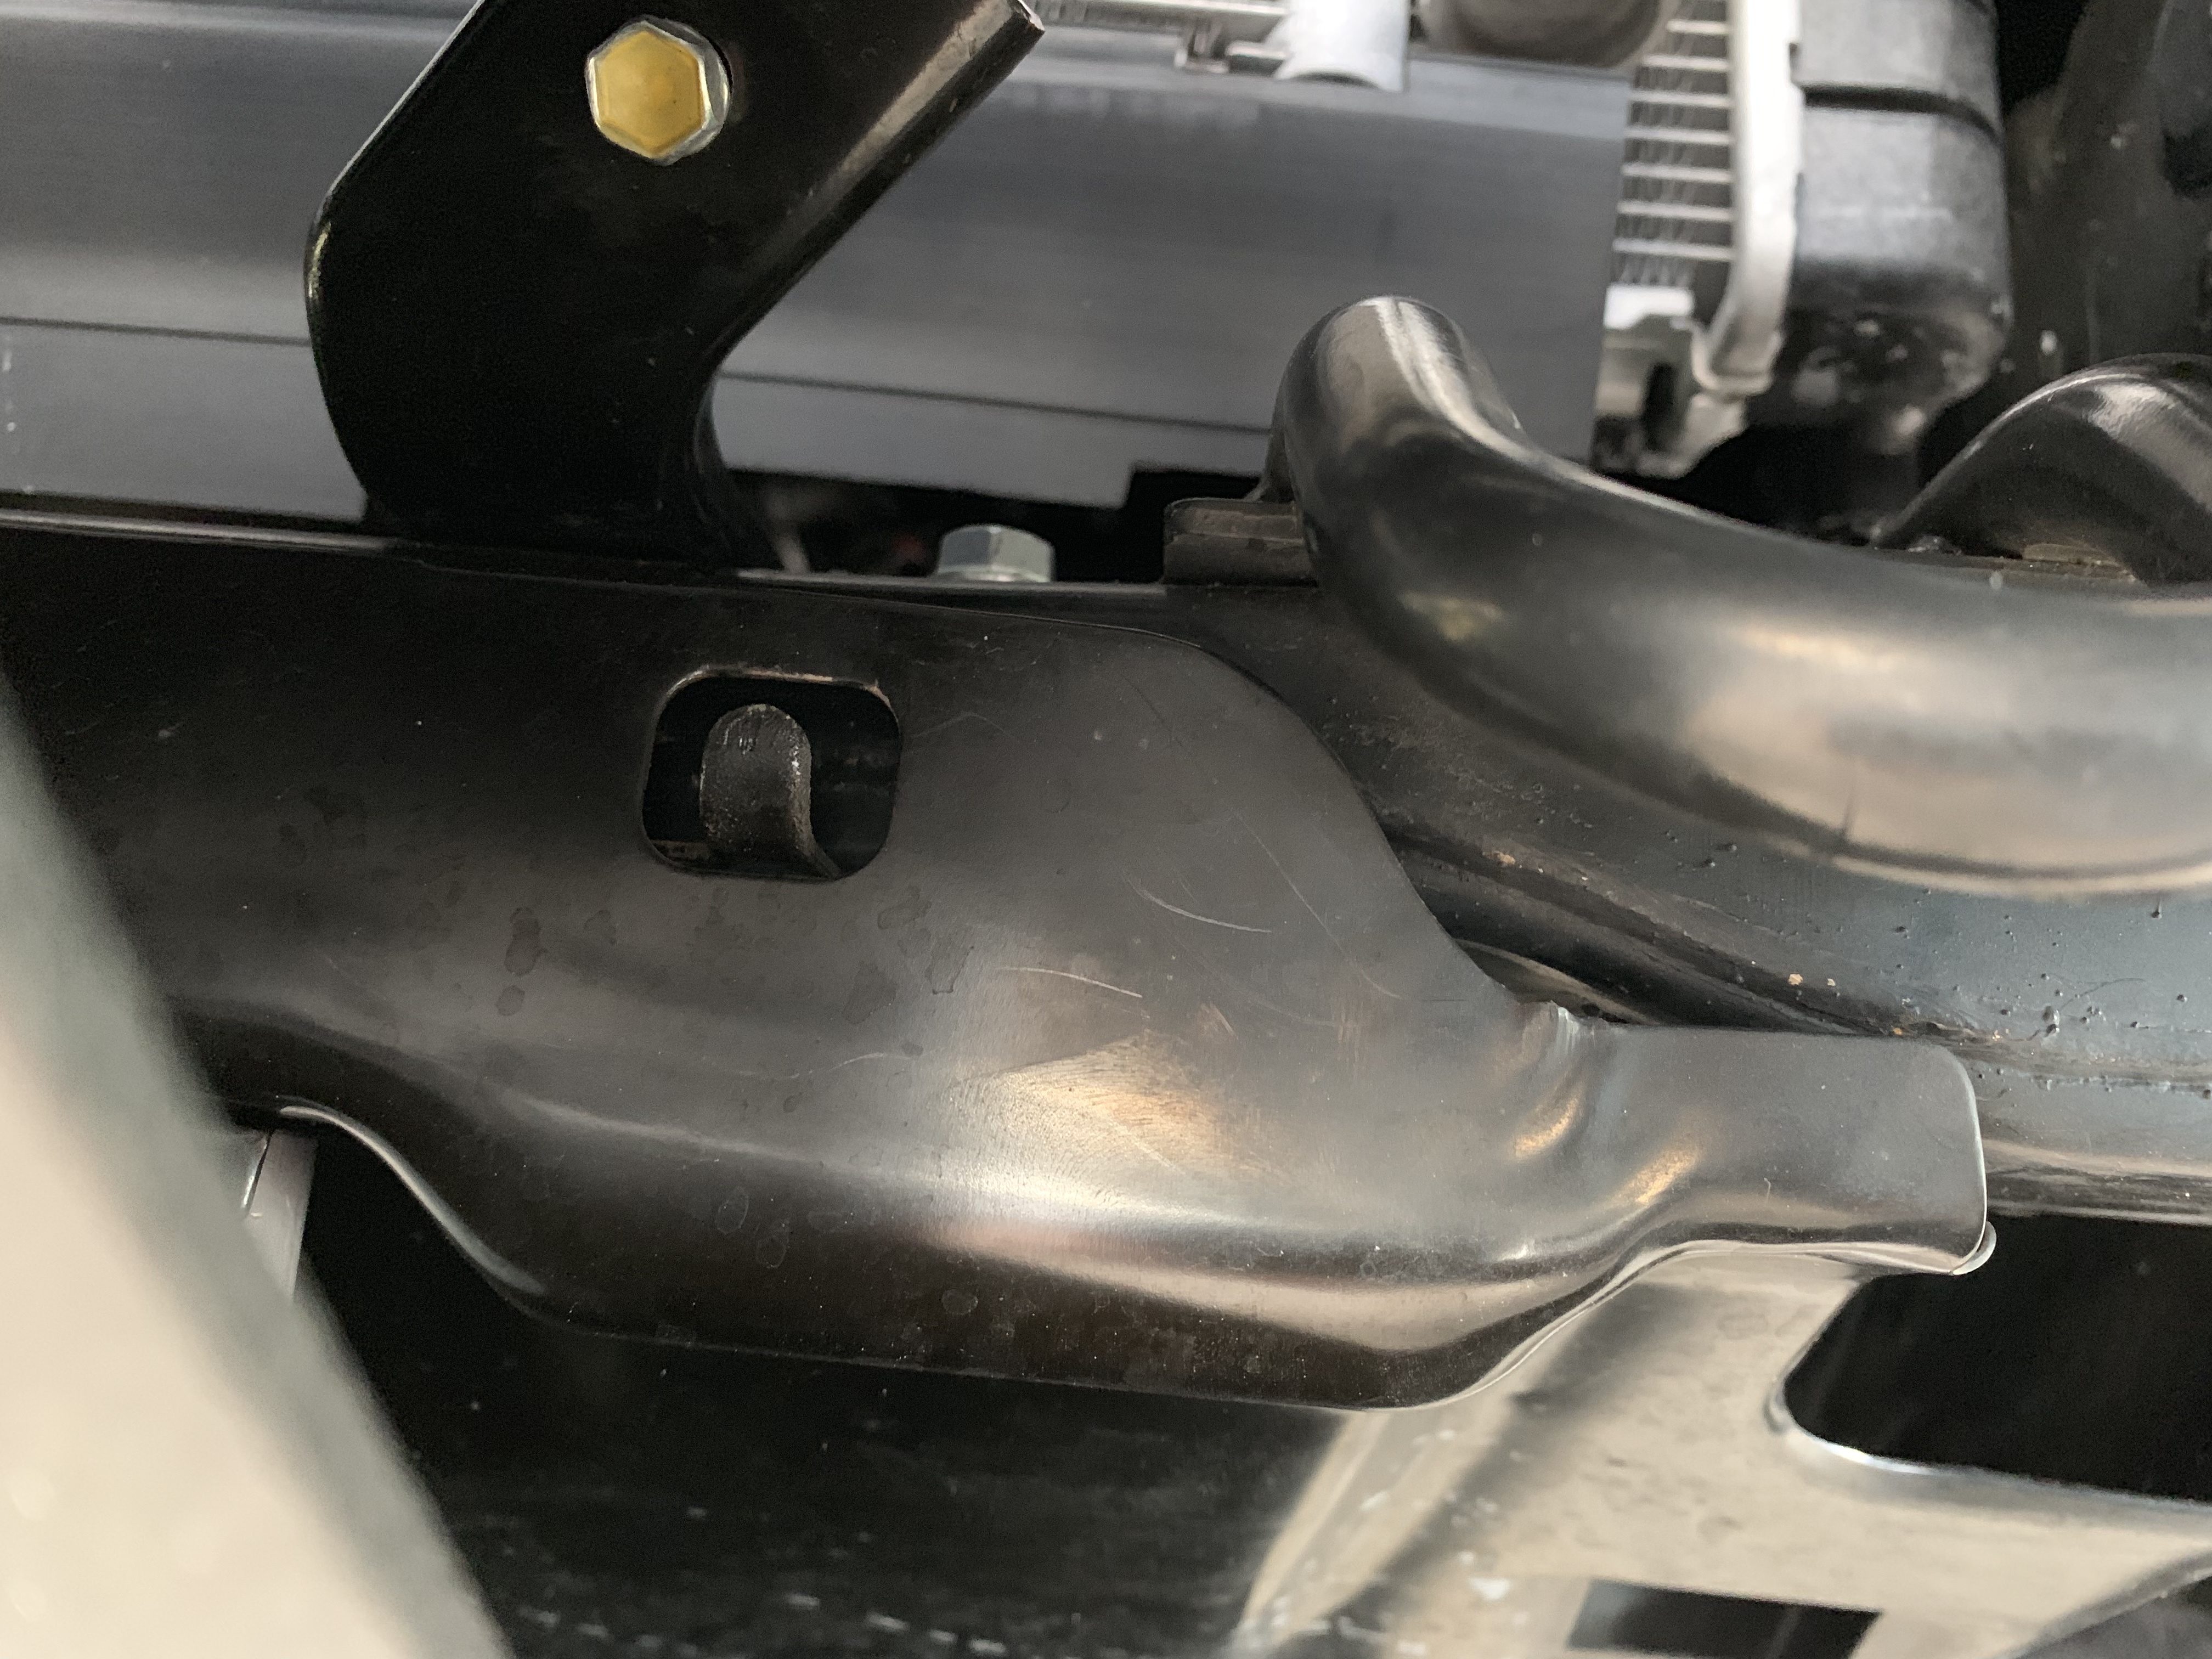
On the skid so you can see how the back has open tabs which slide in between the back bolts and splash guard.
The Struggle
I had a friend help me put it on and we were expecting maybe 15 minutes at most to do this. 2 and a half hours later we had it on…
It Didn’t Fit
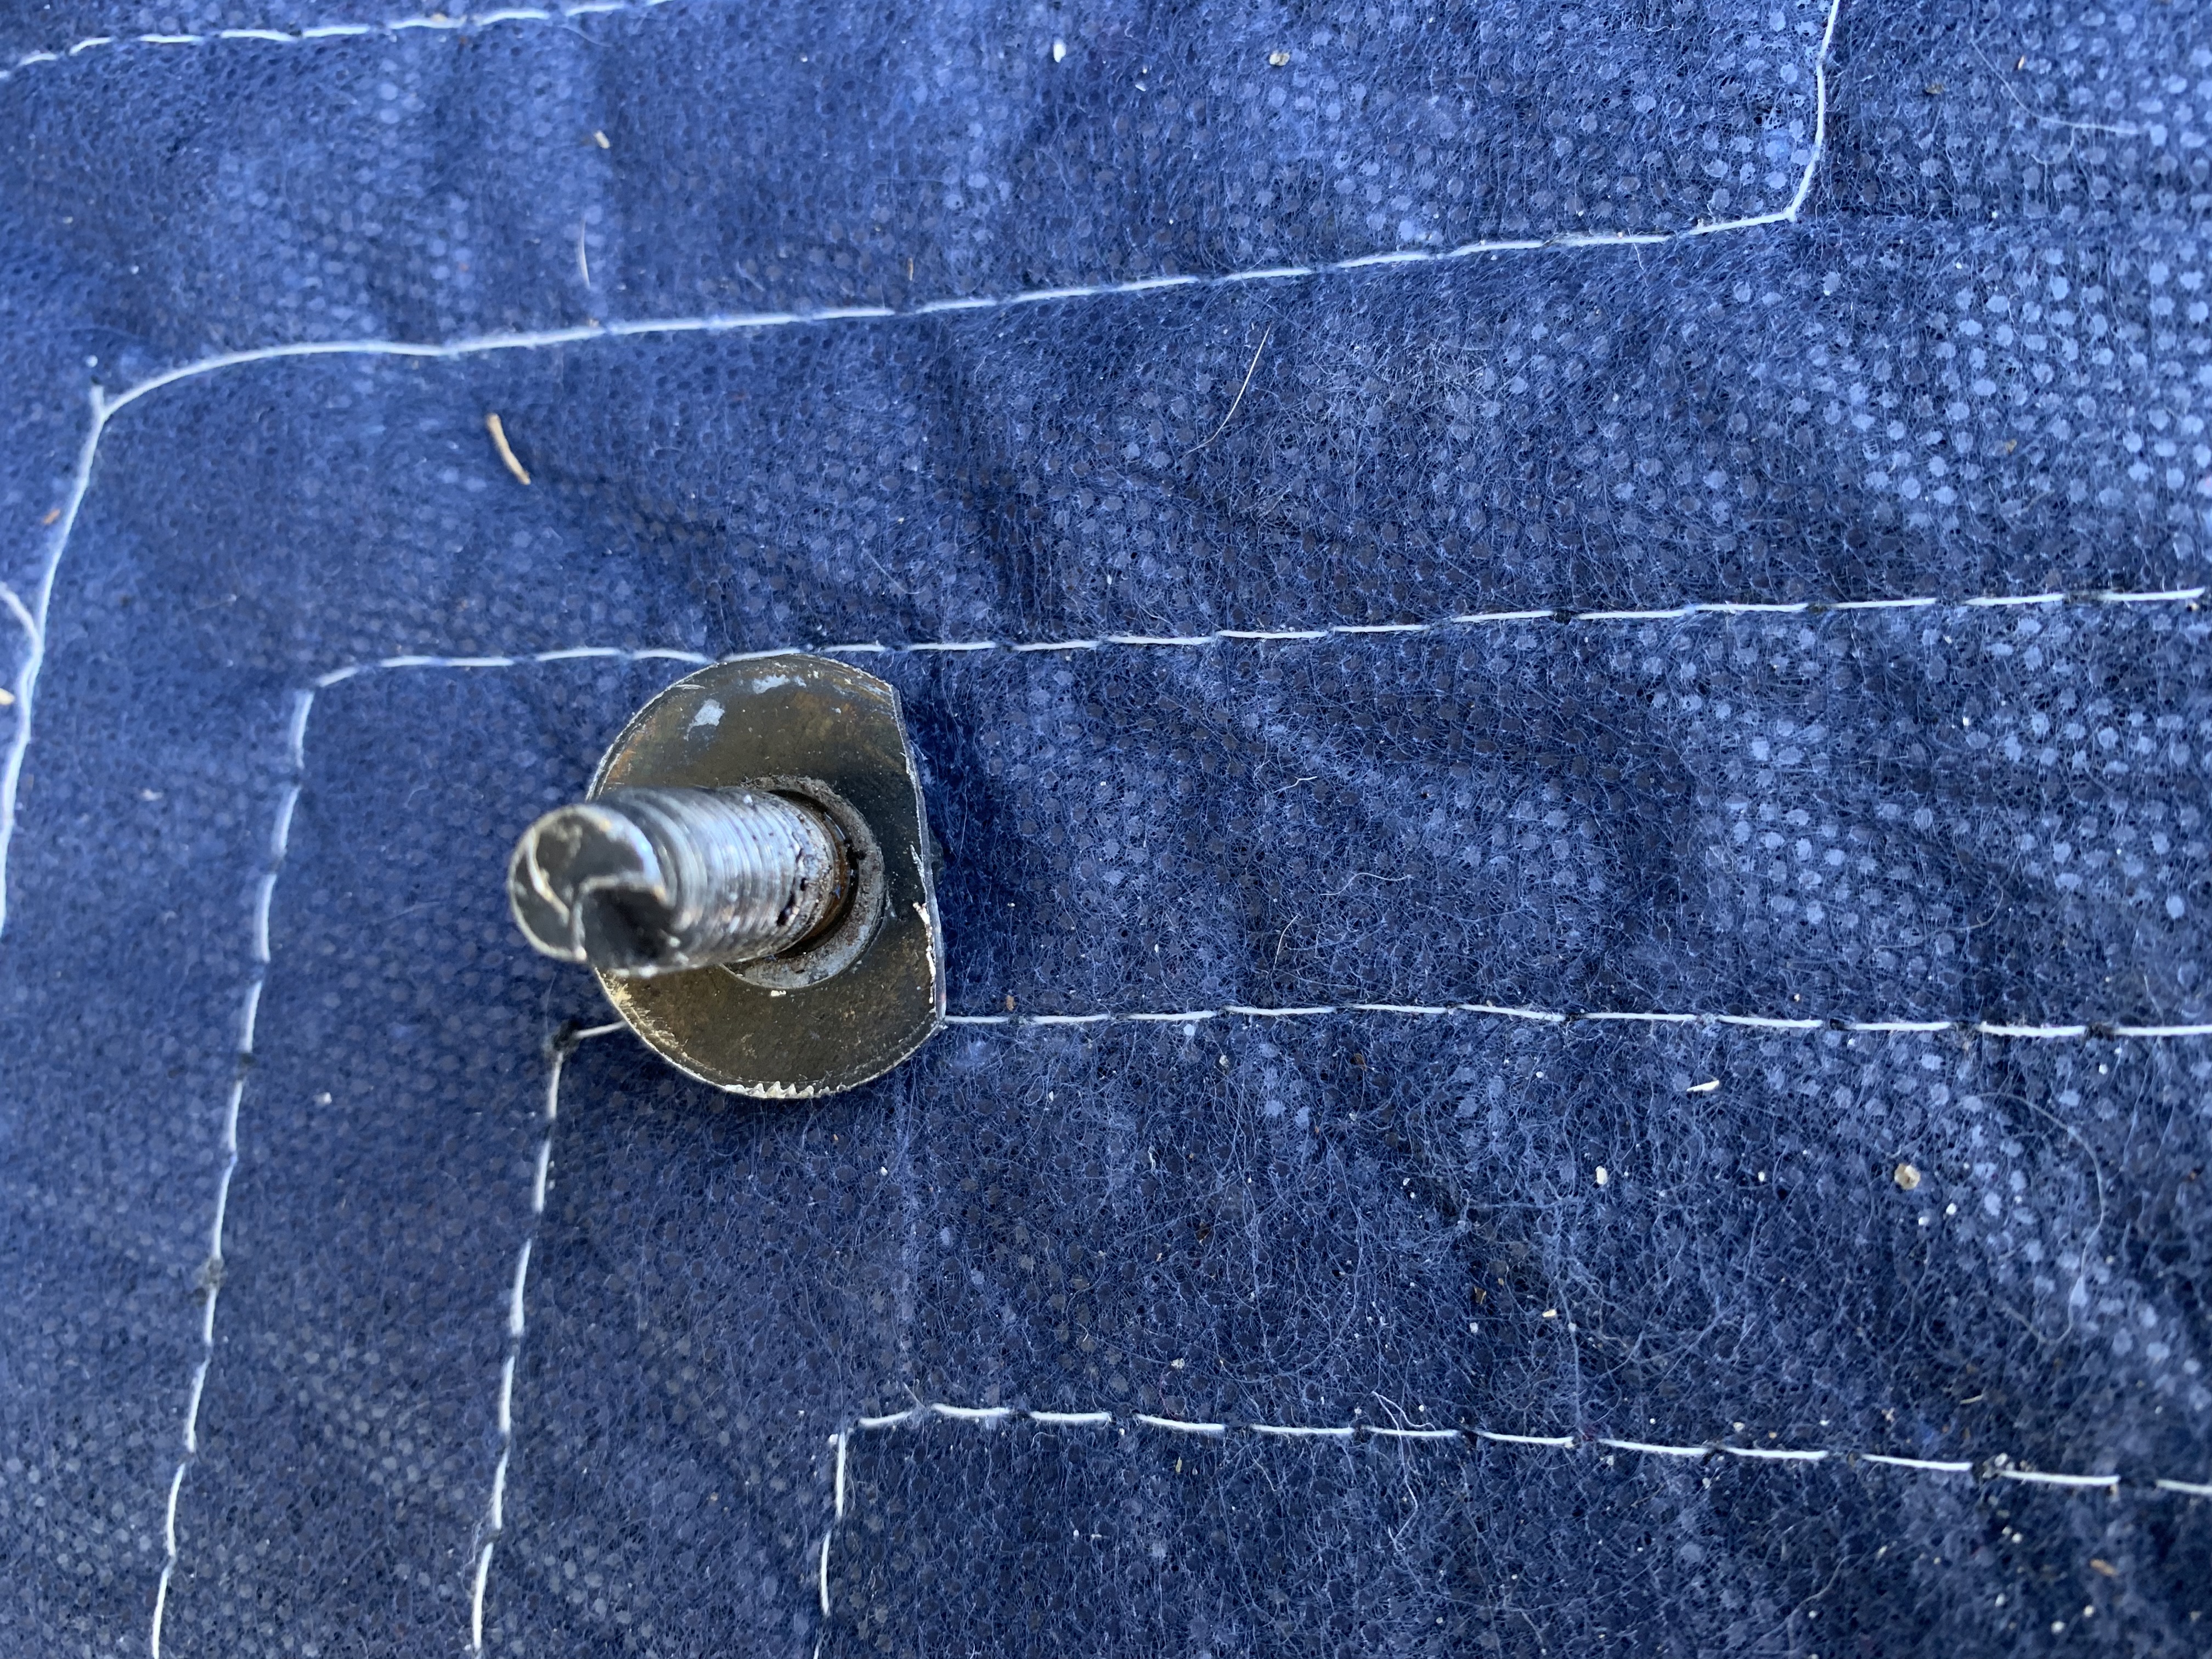
At first we couldn’t get the front bolts to align so they would catch the threads. Finally, we took the back bolts off completely and put the front bolts on. Once we did this we found the truck wasn’t quite square. You can clearly see in the above picture the skid is properly shaped. It’s not warped and each side is a right angle. However, when aligned with the truck it the fitment was ever so slightly off.
The back right tab was about 1/8th of an inch over the hole for the back bolt. The left side was fine and the bolt fit. It’s only the back right that was the problem. I could put the bolts in all three other holes and everything it fine.
This is some sort of tolerance difference between the skid and truck. We’re talking just enough overhang of the back tab to cover the bolt hole just enough that the bolt can’t thread. Possibly the bolt hole on the truck is ever so slightly forward.
One thing I noticed about the splash guard is it has very large holes giving it a lot of play with alignment. Most likely to accommodate slight manufacturing variations like this. If anything BPF made the skid with a little too much faith in Toyota.
At this point I should have stopped and called BPF but I didn’t. I don’t think it’s anything wrong with or an issue because of their product. Also, I could see a way to get the skid on without much effort. I’ll also admit I was a bit impatient because I really wanted to get this thing on my truck. That said, BPF might have had a better solution than mine.
Making it Fit
We tried applying pressure every way we could to get it to fit as is. After that didn’t work we decided it probably isn’t a good idea to get it to fit like that. If we have to force it then I’ll have to do it again with every oil change.
My solution was to grind the tabs to make them longer. We did both sides even though it looked like only the right side was the problem, but I didn’t see any harm in doing both sides just in case.
We ran into a small problem when we tried to put this on with is the washers for the bolt. The above picture is of the top side that goes against the splash guard. We had enough room now for the bolt but the tab curves up. The washer wouldn’t let the bolt go forward enough to use the additional space because it was hitting the angled side of the tab. So the washer had to be trimmed on one side.
The left side now fits properly after being trimmed and after trimming the washer.
We didn’t need to trim the right side as you can see. The skid doesn’t go all the way back and to even touch the bolt.

You can see the recovery hook and how it sits on the passenger side. I recommend putting that on before the skid.
The Spacer’s are Difficult
Now that it actually fits properly we could continue with the installation per the instructions. We had it resting on the back bolts and now we need to get the front ones in.
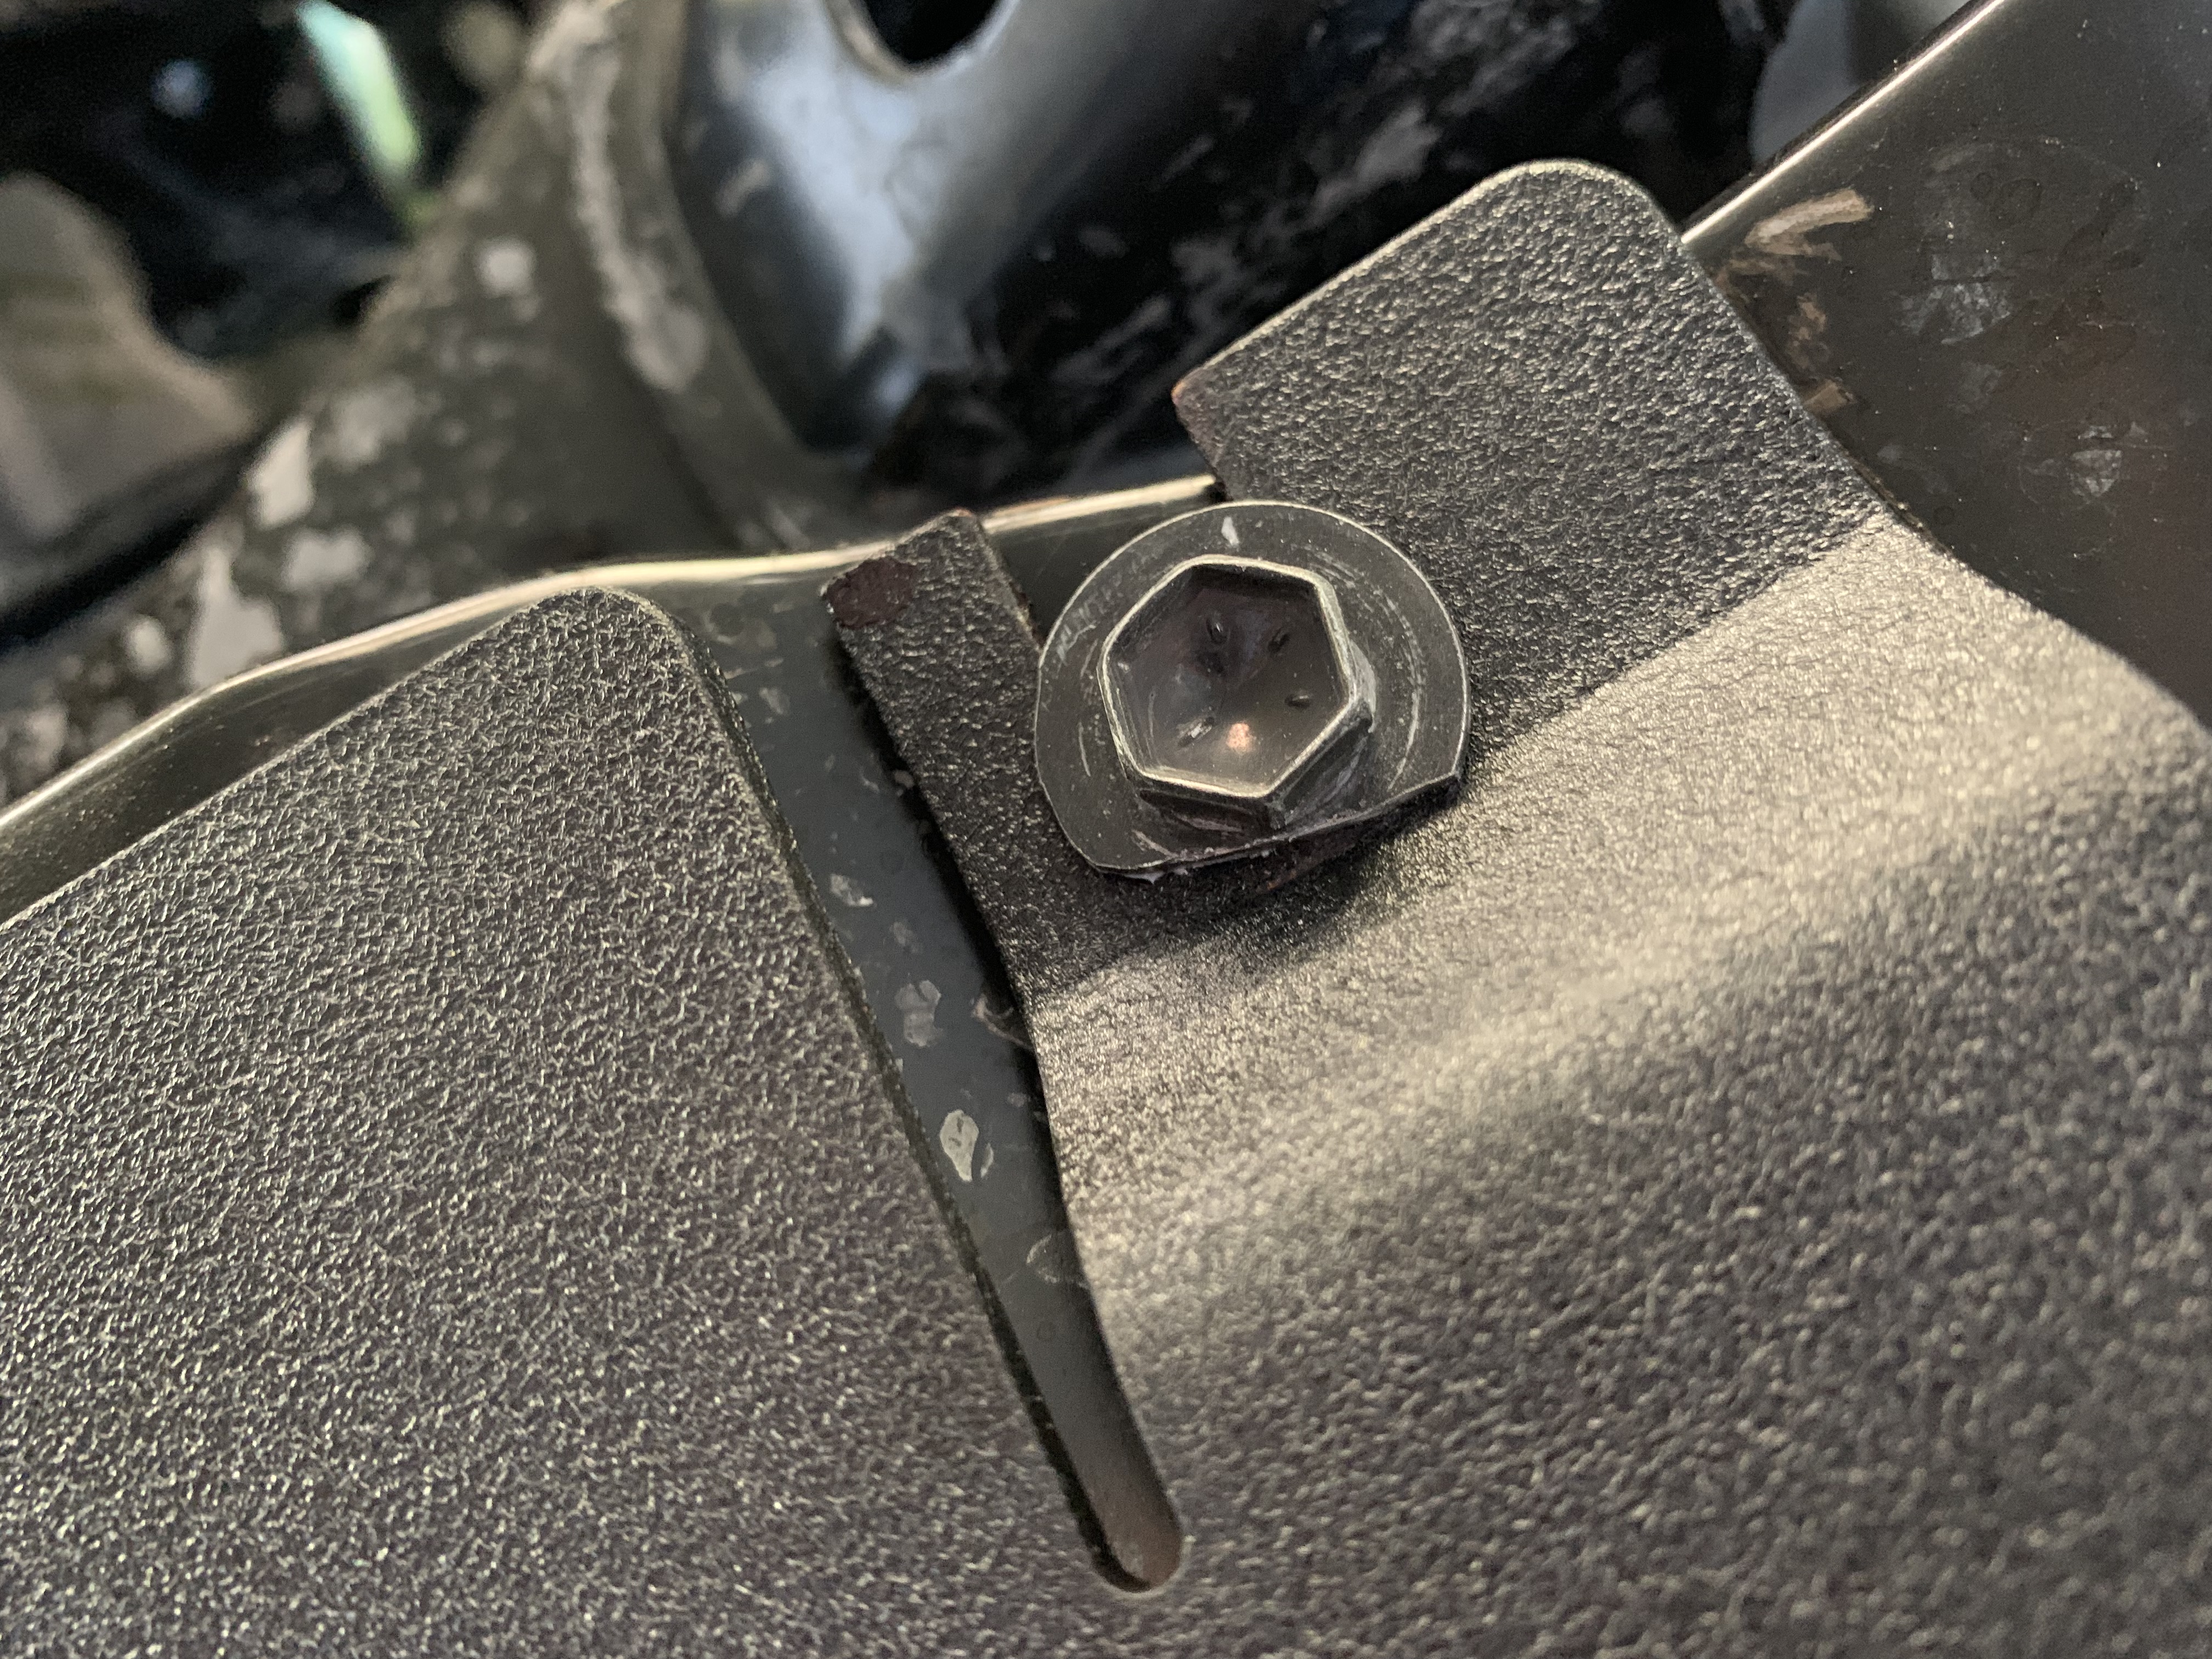
FYI, there are two spacers that sit between the splash guard and skid. They are different sizes and marked P (passenger) and D (driver). If you mix these up the skid will not have proper spacing between it and the bumper.
Getting these bolts in with these spacers is extremely difficult. The splash guard moves around and easily covers the holes the bolt needs to thread into. On top of that because you have a skid plate and splash guard you can’t see the hole at all to line up the bolt.
Oh and there is a ridge that goes in front of the hole that protects the stock bolt. It’s large because it has to accommodate a washer so it only makes it harder to see the end of the bolt. The ridge is on the splash guard so all you know is you’re somewhere near the splash guard hole but it doesn’t tell you anything about where the hole on the truck is located.
On top of all that this is a very long bolt so a small angle at the bottom translates to a large movement at the top.
Not to mention the bolt will often feel like it’s threading but really just catching on the side of the splash guard. So it’s threading and turning but you’re not actually in the right spot.
Trying to find the hole to thread the bolt into is an exercise is patience. You just have to shift the splash guard around and wiggle the bolt until you find the hole and get it in. Eventually the splash guard won’t cover the hole and you can get the bolt to catch.
Possible Solution
I really need to make the front bolts easier to put in. I don’t want putting the skid back on to be more than a 2 minute job when I need to change my oil. What I think will work is getting some long screw thread adapters and cutting them to the size of the spacers.
A screw thread adapter has one thread pattern or bolt size as a male end and a different pattern and or size on a female end. As the name implies it allows you to use one size screw/bolt in a hole for another size.
I don’t need this to change the thread. What I’m thinking is screw in the adapter through the splash guard without the skid on. Then put the skid in position and screw (another screw) the skid to the adapter. By using a long adapter I can have it double as the spacer.
It will be much easier to screw in the adapter because you have a clear view of the hole without the skid plate in the way. You also have more control because you can hold it at the very top instead of far far away. So you get a better view and more control this way. The same applies for connecting the skid to the adapter.
This is only an idea at this point but I think it’s a good proposal. At some point in the future I’ll look into this further.
Living with the BPF Skid Plate (Living without the front air dam)
The skid is on and I’ve been driving around with it for awhile now. The biggest differences I’ve seen aren’t due to the skid but from the front air dam removal. That piece of plastic makes a large and noticeable difference in how the truck performs.
Nothing here is specific to or caused by the BPF skid. These are caused by the front air dam removal. I can’t really say how much if at all this skid exacerbates things but it is not the cause of anything here.
Wind Noise
Wind noise has increased and can be noticeable if it is windy. Everyday driving you really don’t hear very much difference but if there is a strong wind you will notice it.
Be prepared to hear some whistling with a skid. That said, I don’t know if it’s specific to this skid or all skids. It’s possible a more closed and closer skid would be quieter. This skid does sit pretty far away from the underside of the truck (which is one of the reasons it looks so good). I can’t really tell what’s causing the noise so I can’t really say if this has anything to do with it.
There is a TSB for lower control arm whistling (TS-SB-0053-16) in 2016s, but it does not apply here. The fix in the TSB plugs some holes in the lower control arms. The 2018 I have came with plugs already installed. Now, the TSB adds 3 plugs and mine only had 2 from the factory, so I added the 3rd like in the TSB just in case. Unfortunately, it didn’t make a difference.
Harshness
There is more vibration coming into the truck but I expected this. The front air dam shapes the air around the wheels. Removing it causes turbulent air to flow under the truck, directly into the tires, and into the lower control arms, instead of being directed around all of them. The vibration is not tiring but it is noticeably increased.
Wandering
The truck does wander in its lane a little bit more. Nothing uncontrollable or even annoying. It’s still perfectly manageable and but even after few days you won’t forget the difference. The truck does feel like it gets pushed more when there is a strong wind in front or at an angle to the front.
On a day with little to no wind there isn’t much of a difference than before removing the air dam and putting the skid on. However, wandering increases with the wind. This is true with the air dam but it’s worse without. I’d say the air dam not only reduces the overall wandering but dampens it providing a smaller relative range compared to the wind speed.
Gas Millage (MPG)
This is the big one. I’ve heard the front air dam provides a 1 mpg gain so removing it I’d lose 1 mpg. That’s exactly what I’m seeing since putting the skid on. Looking at the average tank mpg for a few fill ups and I’m seeing a 1 mpg reduction.
Something to keep in mind of gas prices start to increase again…
Conclusion
Overall I’m very happy with the look of the BPF skid plate!
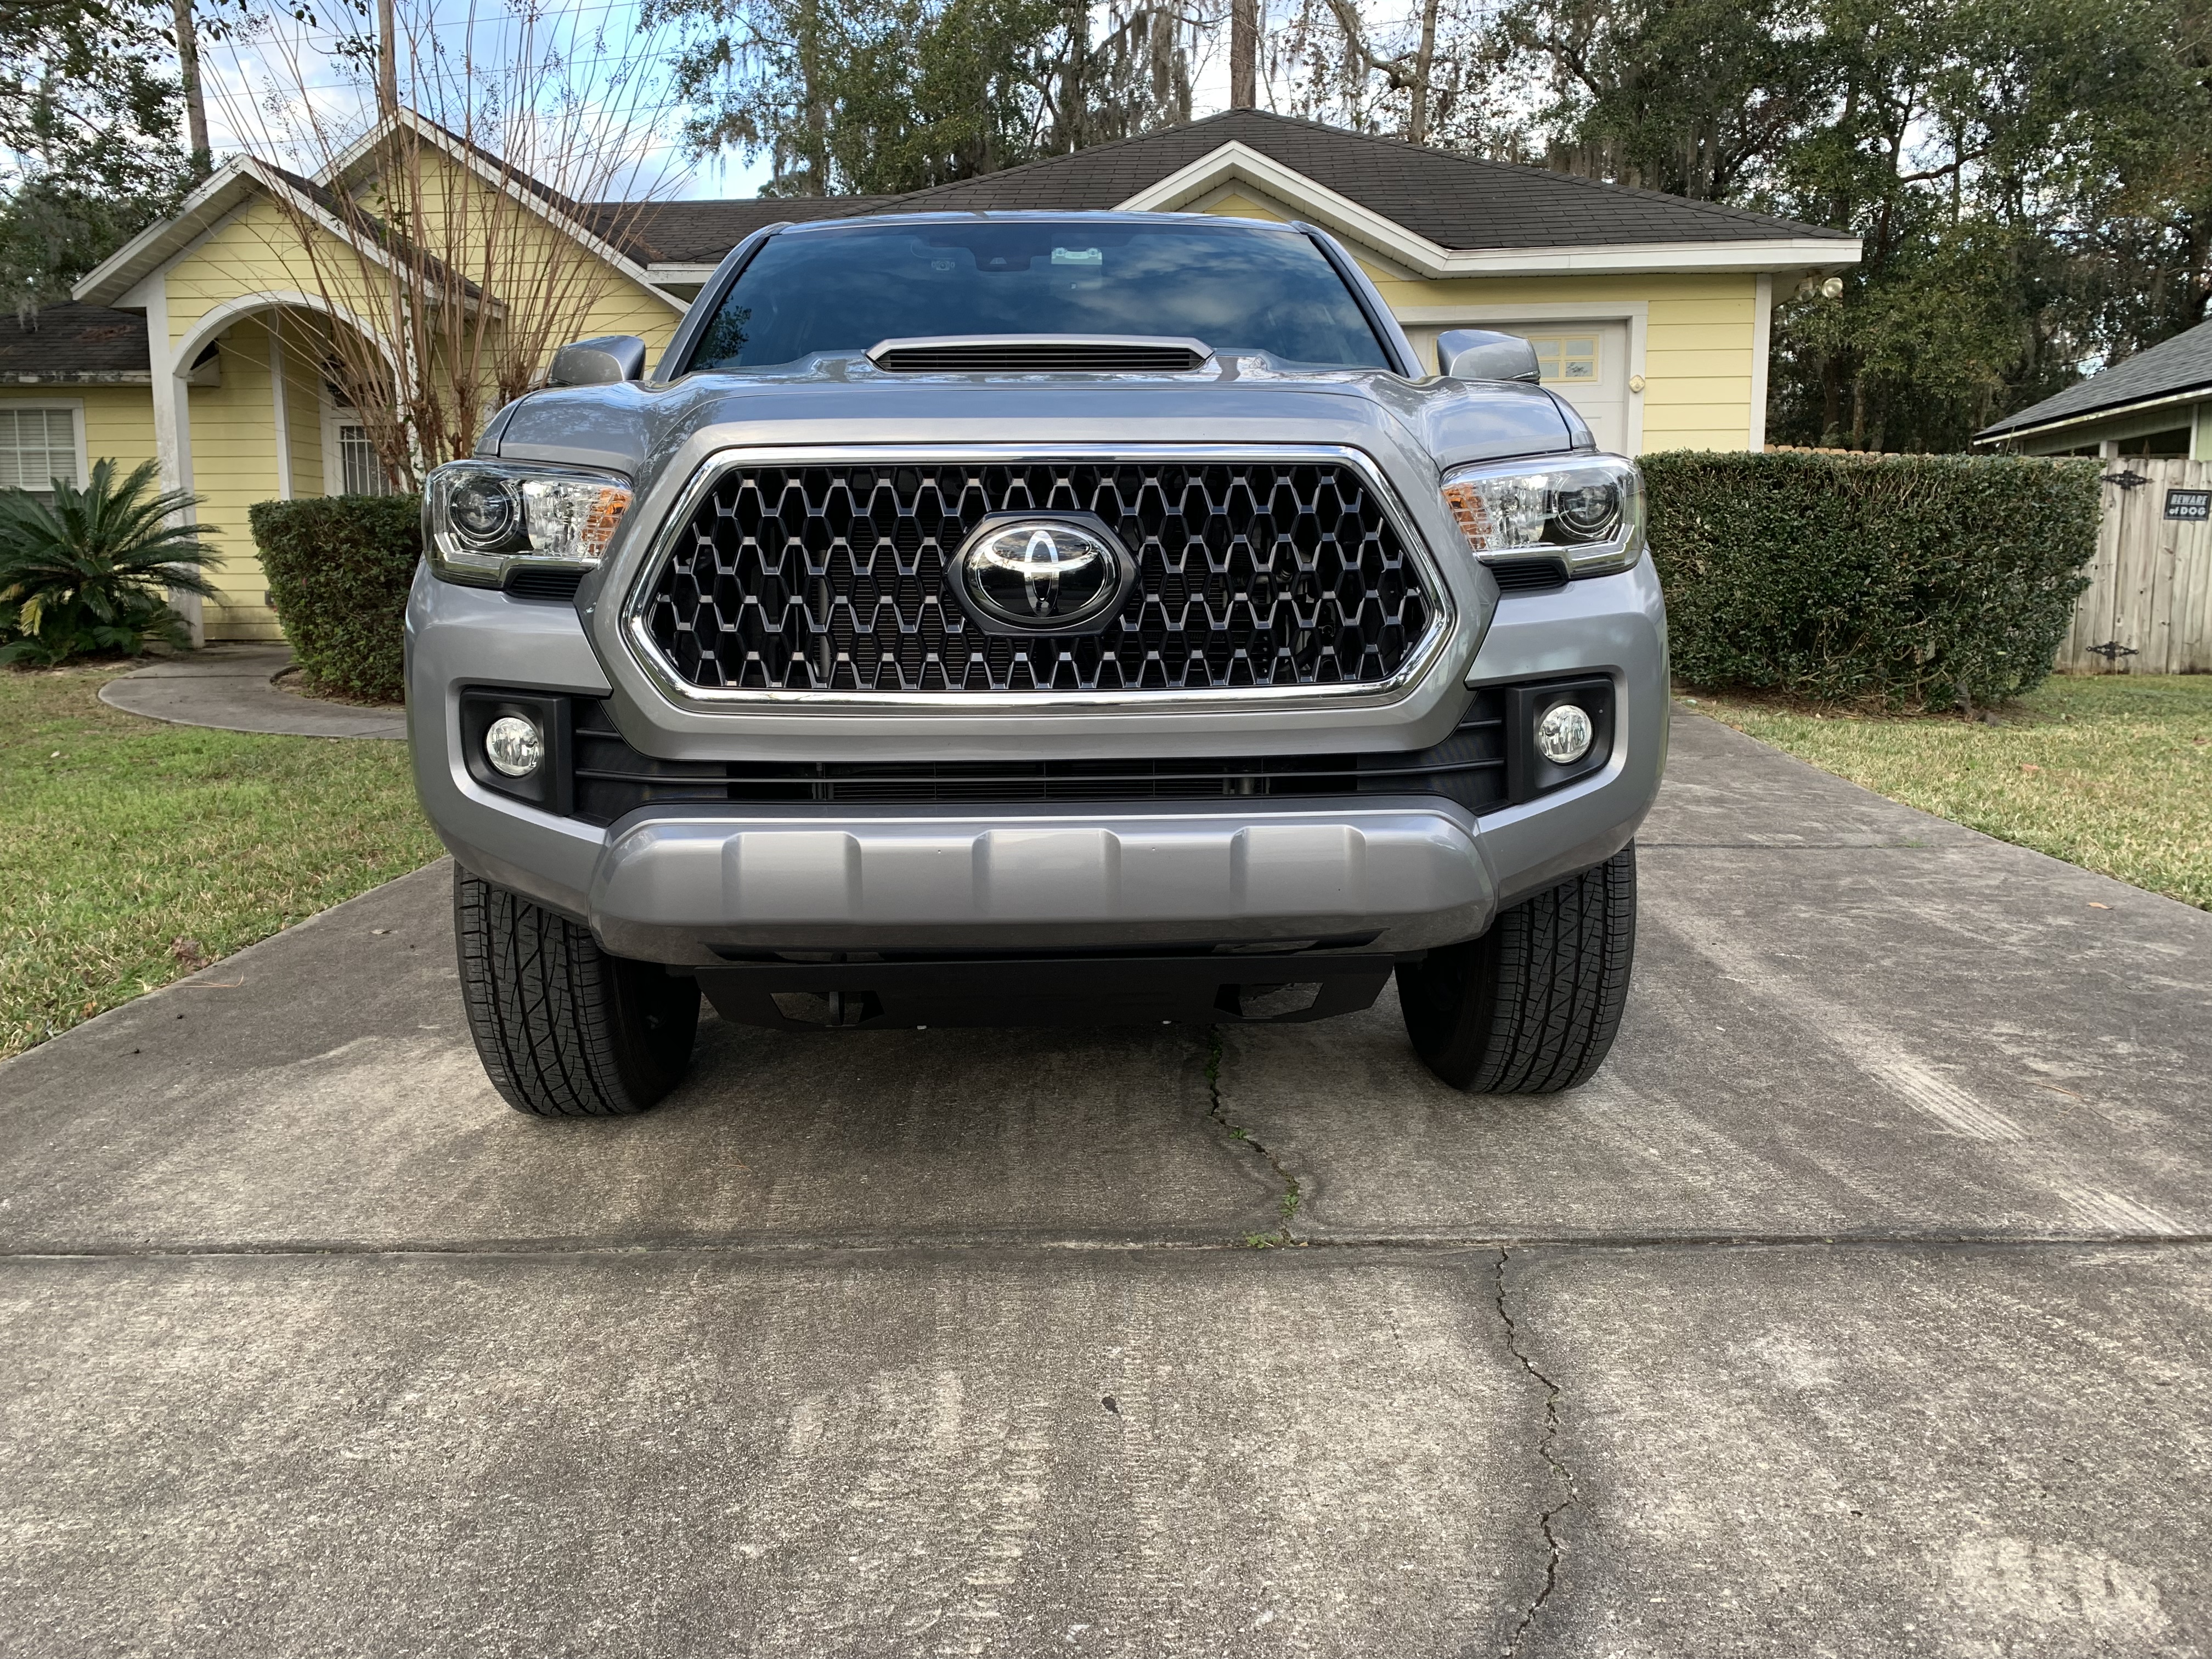
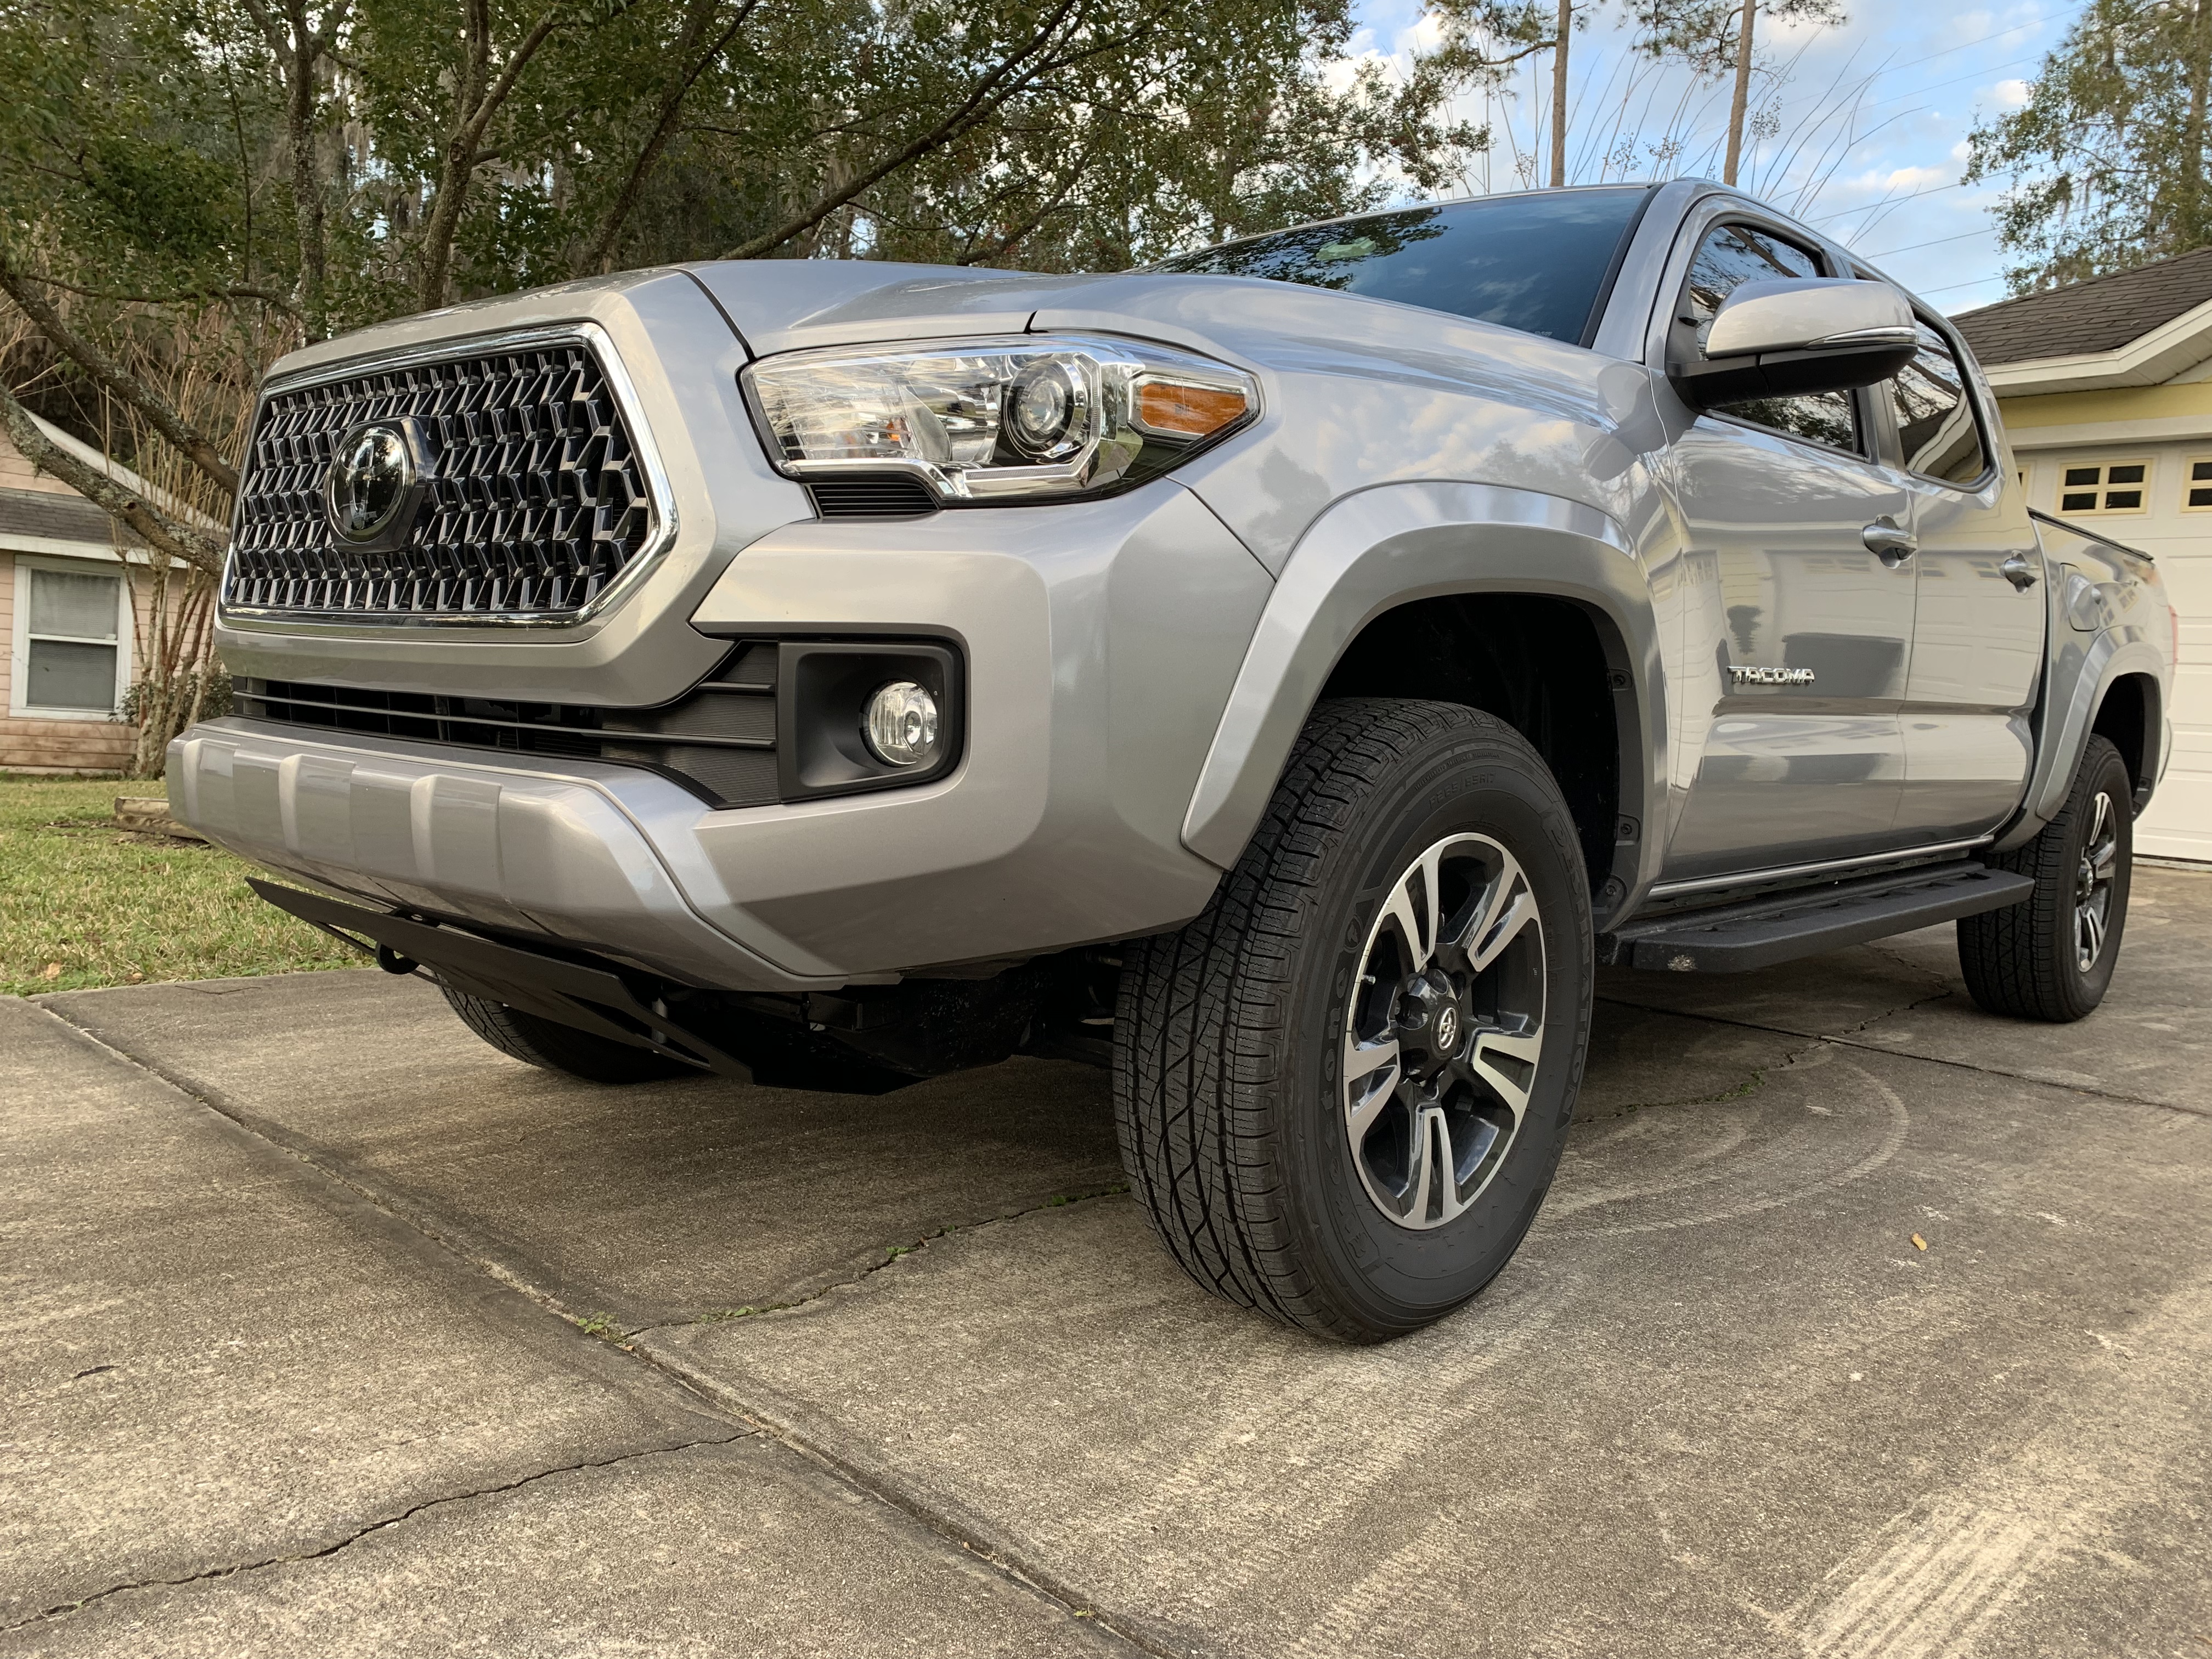
While it’s hard to make out the TRD stamp I won’t hold that against BPF. It’s a black piece of metal under the front of a truck after all. The textured powder coating looks great. The skid on the truck looks great. While I did buy it based on appearance over function it is still functional.
If I had to buy another skid for my truck I would buy this one again. Overall I’m extremely with it even with the little niggles I ran into.